* this has been in my drafts for sooo long and I’m still not giving up finishing this Japan travel blog series
I’m excited na makabalik sa USJ at makasakay ulit sa Flying Dinosaur, my favorite ride. Pero ang sad na wala na yung isa kong favorite, yung Space Fantasy. Huhu whyyy.
My kyot sistar. Muka ng Mama haha!
Hindi ko alam bakit naligaw nanaman kami papuntang USJ. Nagmamadali pa naman kami para makakuha ng free timed ticket to Nintendo World. Pero buti na lang umabot pa rin kami. Gusto kasi ni Tricia na bumili kami ng Express Passes na pagkamahal-mahal para sure yung entry namin sa Nintendo World. Pero buti na lang nagtiwala sya sakin na makakakuha kami for free. Tsaka hindi peak season kaya rin siguro nakapasok kami.
Yung mga pinuntahan namin ngayon, ito yung mga popular na attractions. Akala ko mga napuntahan ko na pero hindi pa pala. Kaya ang saya na first time namin pare-pareho.
Morning festivities
Hindi pa sumasagot yung Airbnb host tungkol sa shower. Kasi nakalagay naman sa listing nila may hot water. Iniisip ko 8 days pa kami dito tapos ice tubig yung ipanliligo namin araw-araw?? Huhu noooo!
This trip is 8 months old pero sinipag akong i-document. Nung umuwi ako ng 2022, ang side trip namin ay Bohol. This year, excited ako kasi first time ng Mama at ni Tricia sa Japan! Winter yung visit namin kaya ang hassle, kasi mga makakapal na jackets ang dala namin. Nagkasakit rin ako dahil sa extended exposure sa lamig, plus yung pagod paglalakad. Nagkaron pa ng drama at iyakan nung huling parts ng trip. Haha!
First solo international flight ko ngayon. Hindi naman ako masyado kinakabahan kase twice na ko nakapuntang Japan. Nakapag solo flight na din ako dati nung pumunta kong Cebu pero andun naman si Kenneth. Ngayon solo lang talaga ko. 3 days lang naman mabilis lang. Ang ayoko lang sa trip ko na to eh naka parang dorm lang ako (para tipid). Eh medyo paranoid kasi ako feeling ko laging may mangyayaring masama (PTSD). Siguro next time hanap na lang ako ng mura basta solo lang ako sa room. Safe naman sa Japan pero mas ok pa din yung sigurado.
Kailangan ko nang maligo in 10 minutes. Sana wala akong malimutan. At sana wag ako masyadong maligaw dun kasi hindi na ko nagrent ng pocket WiFi. Wala naman ako masyadong pupuntahan.
Sounds good, right? And this includes plane tickets, airport fees, accommodation, food, a pocket WiFi, a trip to Universal Studios Japan and a few souvenirs. But a little disclaimer, I just have to say that this isn’t easy. You need to have the stars aligned in your favor to be lucky enough and get the cheapest flight, to not be choosy and book the cheapest (but still decent) accommodation, and be patient enough to do some research to score some deals (ticket discounts and vouchers).
I actually didn’t spend ₱18,000 because I bought a lot of stuff for my online shop and I also did some art tools hunting for my artsy projects. But not everyone has an online shop and not everyone has this art hobby, so all the money I paid for those things doesn’t count. Some of you may think that this is a joke and say that the ₱18,000 could just cover the plane tickets and terminal fee alone. But as I’ve mentioned earlier, you have to be really lucky to get a roundtrip ticket for just ₱2,400 like I did (thanks to GetGo). But even if the circumstances are different for you now, I think you can still pickup a couple of money saving tips with this trip. So this is how I managed to do it:
Visa Application (₱950)
For the second time around, I applied for my Japan visa via Reli Tours and Travel agency because they have the cheapest handling fee. Luckily, I was granted a multiple entry visa for this trip. Yay!
I booked my ticket via Cebu Pacific using my GetGo points. At that time (maybe 7 months before our actual trip), GetGo held a promo. For only 10 points, you can book a one-way ticket to any country you want (so 20 points for a roundtrip ticket) and all you had to pay for is the travel taxes and web admin fees which amounted to ₱2,400. If you have a gazillion points, you can also have the option to pay the taxes and fees with those points so you can basically fly for free. I had about maybe 15,000 GetGo points at that time because I kept on converting my BPI Real Thrills Reward Points to GetGo points. You can do this as well if you have a credit card and love traveling. If you can cover the base fare with just GetGo points, all you have to do is pay for the taxes.
Accommodation via Airbnb (₱2,650)
I stayed in Japan for 7 days so that’s just ₱450 pesos per night! Some person gave me a referral link and that includes a ₱1,000+ voucher discount for my booking. You can also get an additional discount from Airbnb for a one-week stay. I came with four of my friends on this trip so what I did was, I gave them my own referral link and they got the same discount. I’m going to share with you my link as well if you also want to get that P1,100 discount on your first booking with Airbnb which is: www.airbnb.com/c/gleniza.
We stayed at Four Letter Words Hostel which is a very humble and straightforward accommodation. All the basics are available: comfy sleeping nooks, fast WiFi, hot showers, it’s also in a great location plus you get an entertaining and very kind host. He even offered us a free stay on our next trip to Japan! He said that we can stay there for as long as we want and bring some friends. I honestly don’t know what more could you ask for.
Pocket WiFi via Klook (₱1,615 – only ₱230 per day)
This I think is optional for some people. But I like renting a pocket WiFi when traveling to Japan. Their train lines can get pretty complicated so I always have to look up train stations and the appropriate fare for each train ride online. When navigating, the site I always go to is called Hyperdia. This amount could get much cheaper if you’re traveling with your friends or family since you could just split up the total rental fee. I was given a 7GB data allowance and I only consumed around 4GB during my whole stay.
Kansai 3-Day Pass via Klook (₱1,990)
I got a 3-day pass since I planned on traveling to Nara, Kyoto and Kobe. You can opt for a 2-day pass which is a couple hundred cheaper if you want to leave out Kobe in your itinerary. But going to Nara and Kyoto is highly highly recommended! In my case, I lost my pass when we were in Kyoto so I had doubts to go to Kobe the next day. So it’s up to you if you would like to get a 2 or a 3-day pass. Klook also offers promo codes, and since I’m a first time Klook user, I was able to get roughly 15% discount when I purchased the pass and pocket WiFi. I just used the promo code GETKLOOKD (not sure if this is still active though).
As you may notice, I kept on thinking of ways to get discounts in every purchase I make for this trip. That’s what I meant when I said that you got to have patience. Research first before making hasty (and expensive) decisions. Ok next:
Universal Studios Japan ticket via Klook (₱3,380)
I didn’t really visit USJ during this trip because I had the chance to go there last year. But my friends did so I included it here. I was busy buying stuff in Don Quijote while they were enjoying their USJ visit. I think last year, we spent ₱3,500 for our USJ ticket; so booking via Klook is a bit cheaper. And as you may already notice, Klook really helped us a lot with this trip. It’s very convenient that we can book all these things with just one app. Aside from convenience, the most important thing is that it’s cheaper.
Transportation to and from Kansai International Airport (₱850)
I included this separately because traveling to and from the airport is pretty expensive. From the airport, we just rode a train going to Tengachaya station which is just a 10 to 15-minute walk from our hostel. It was quite a long walk because we had our luggages in tow. But it’s much easier since we don’t have to transfer train stations.
Tourist Spots (Almost Free)
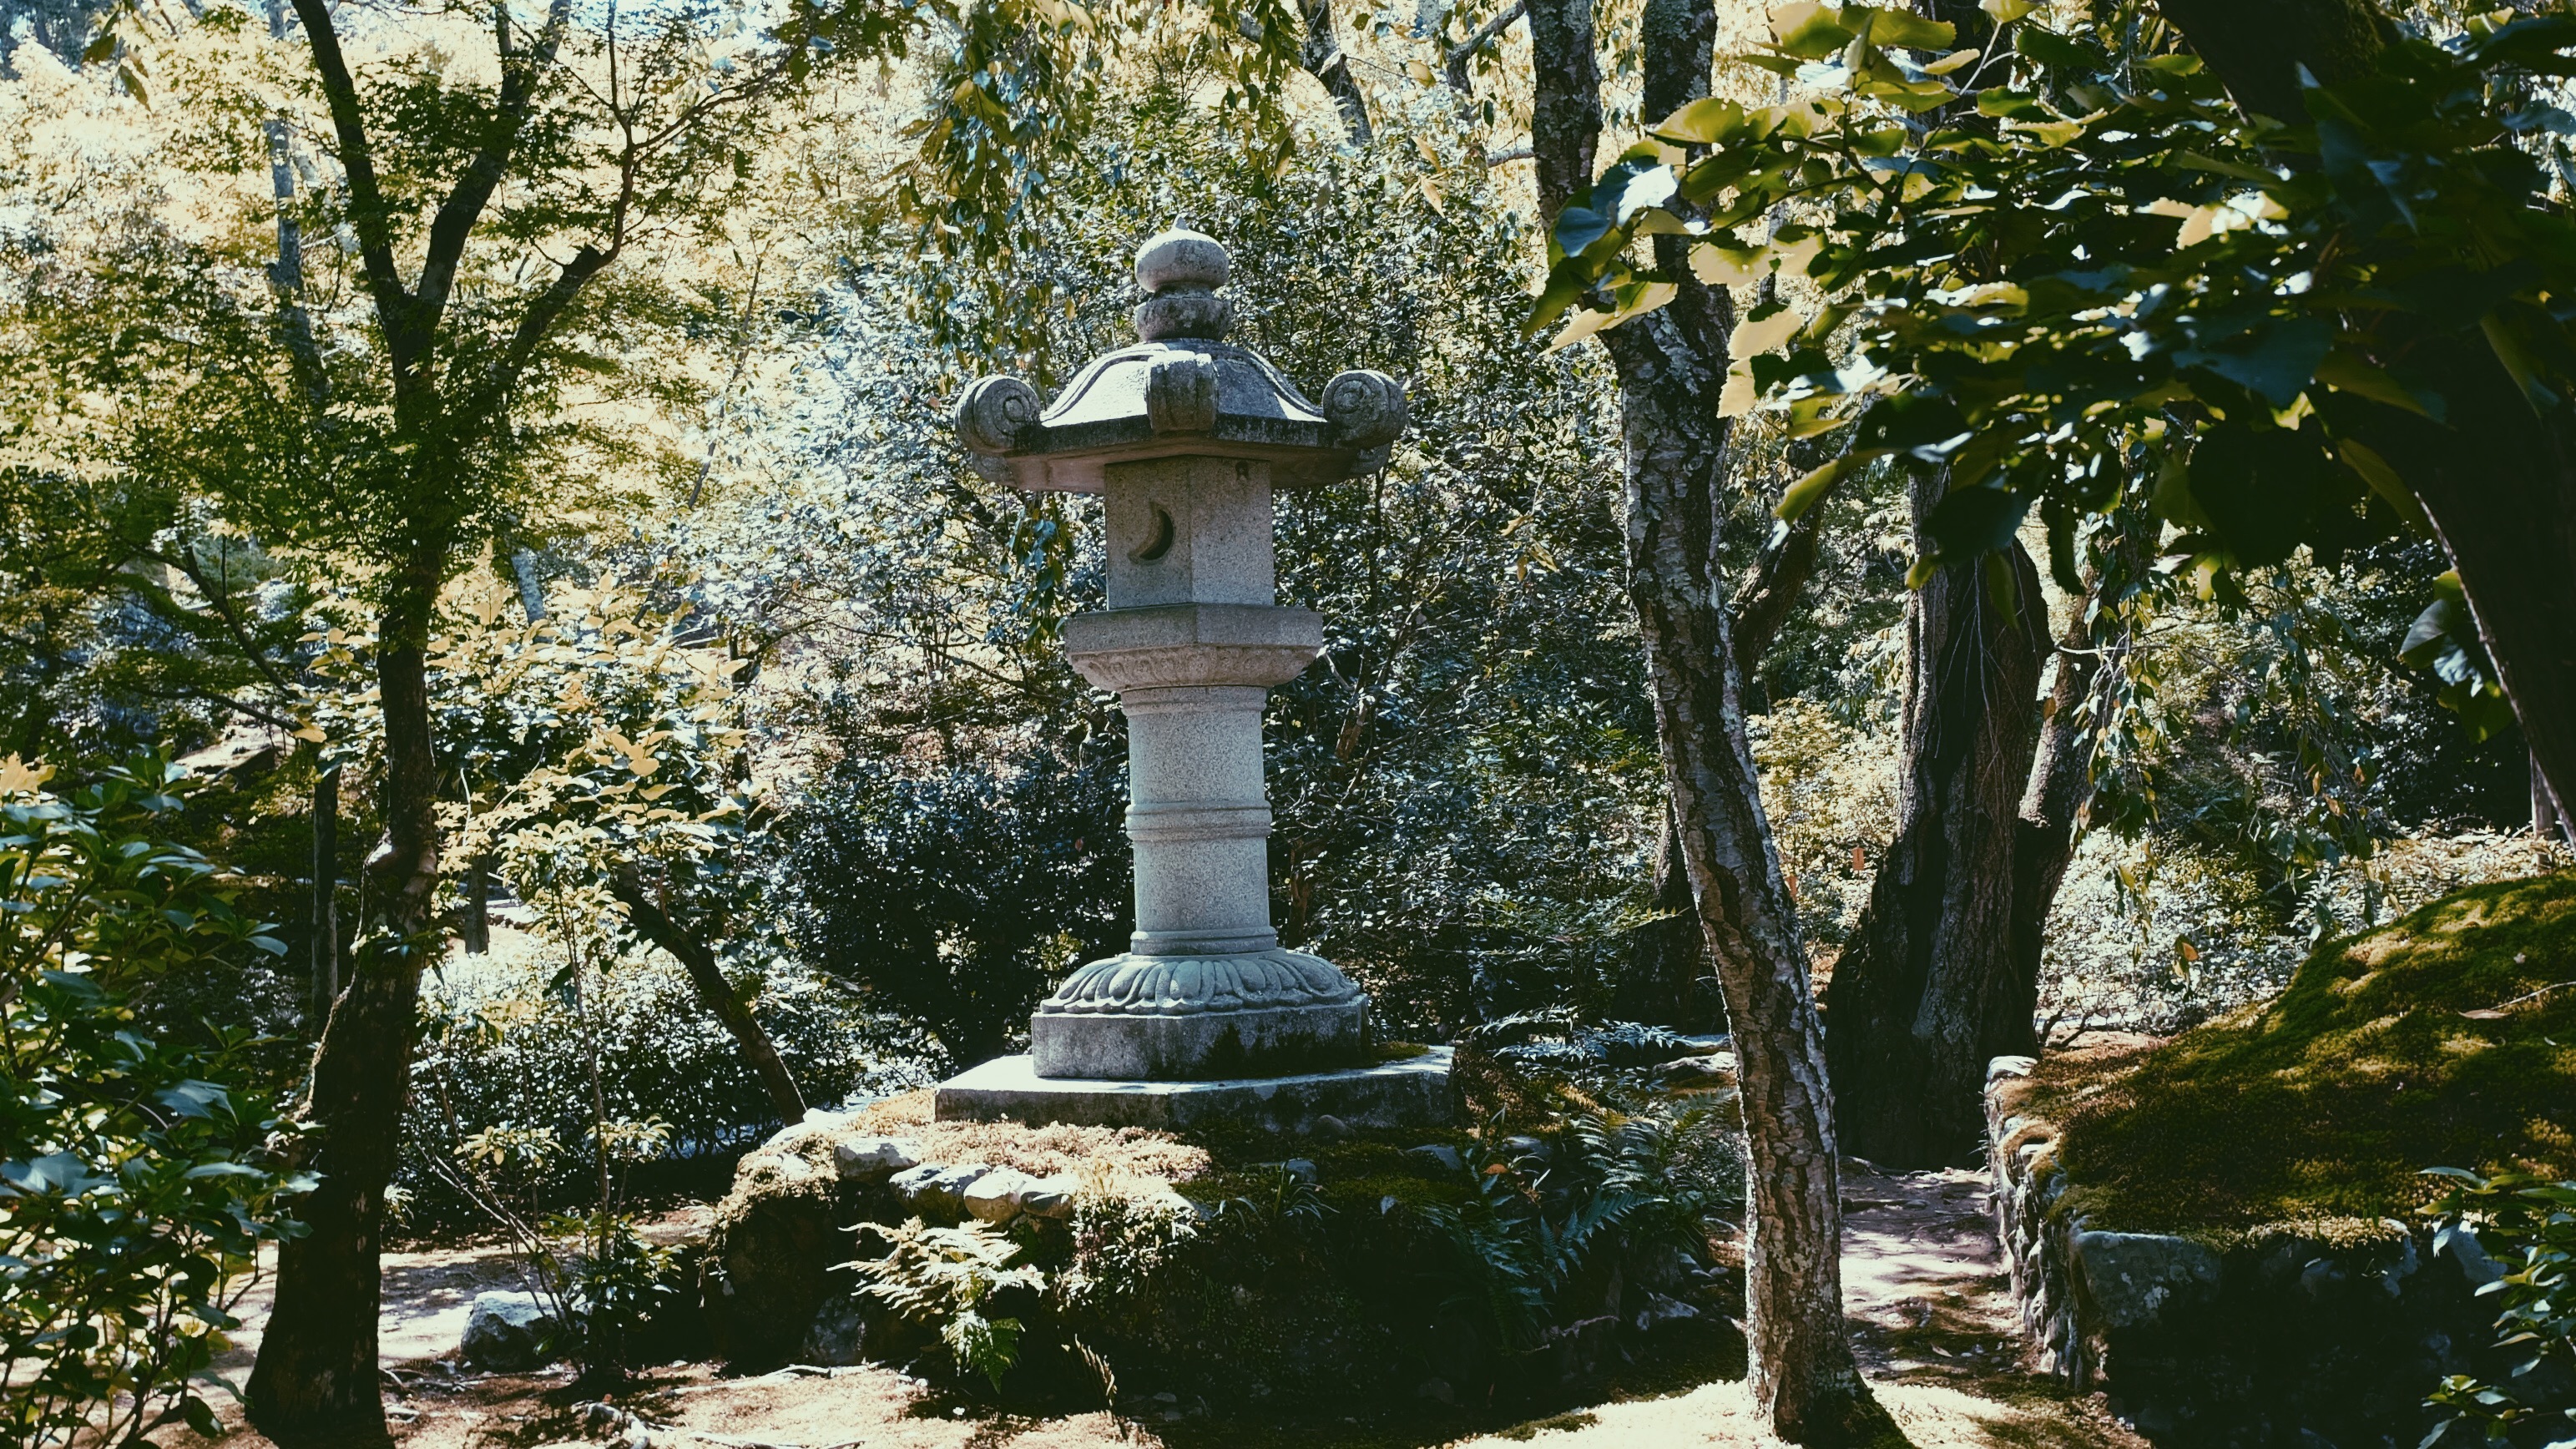
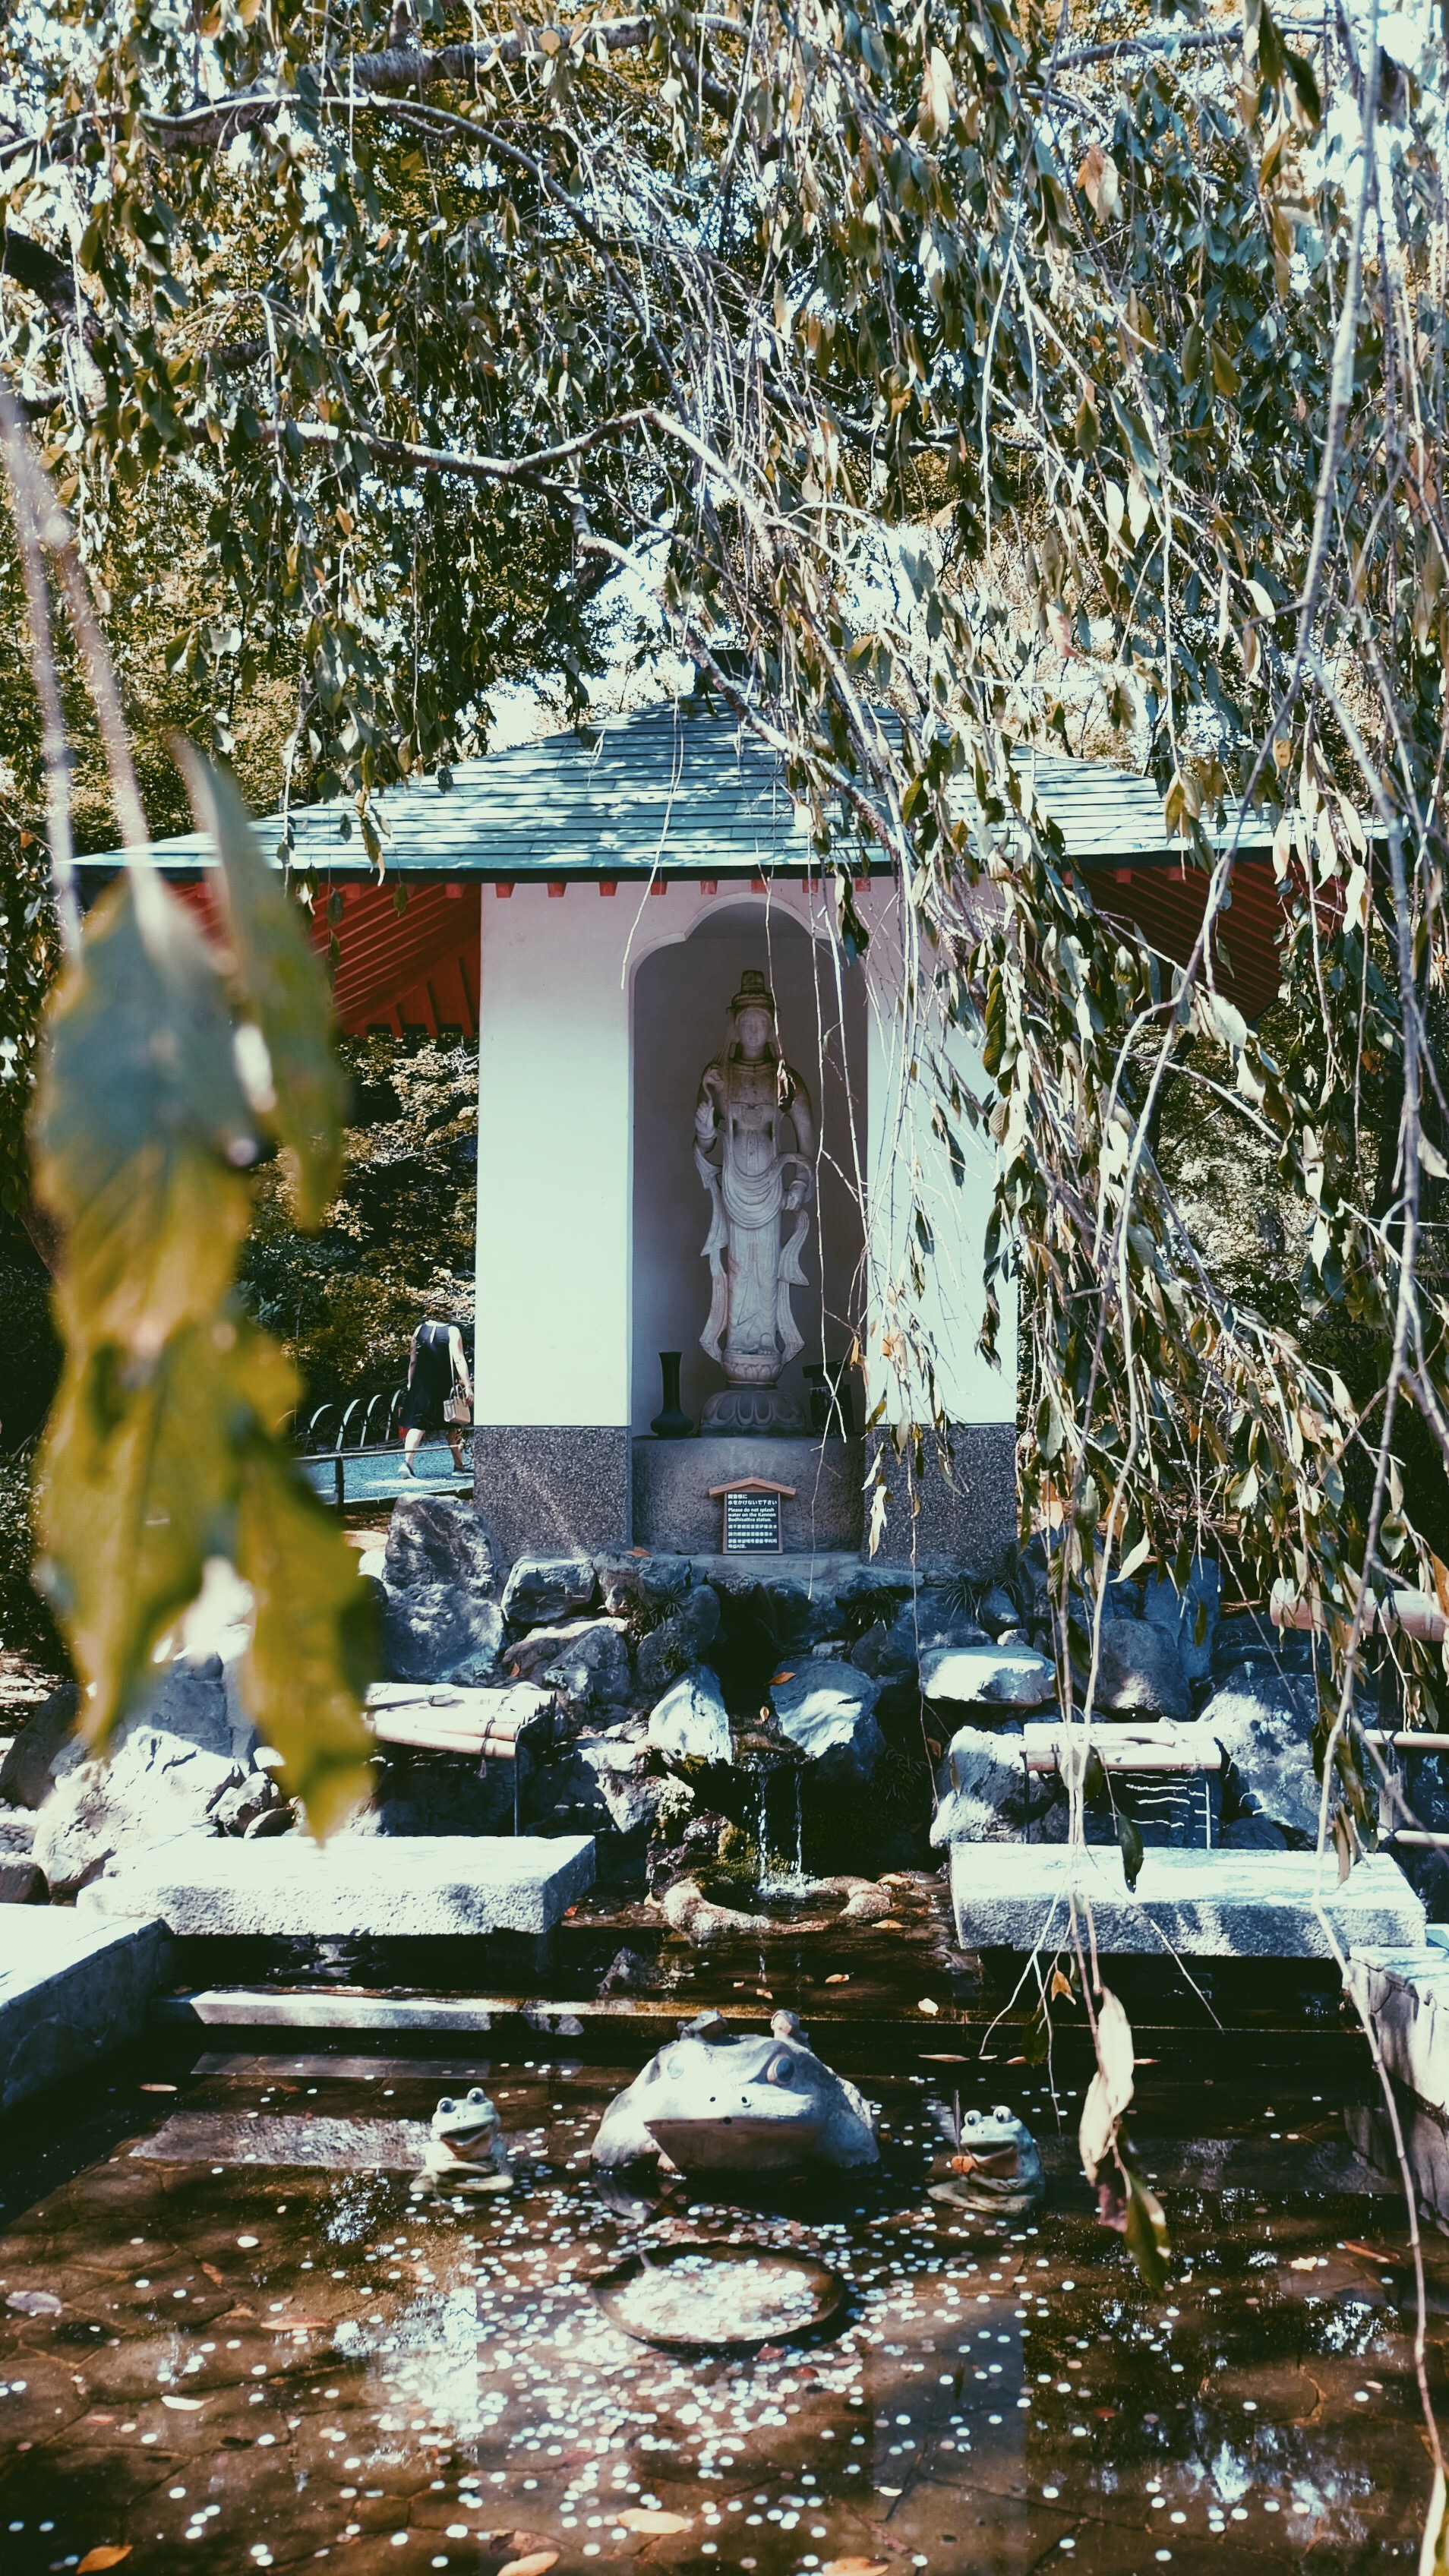
With our Kansai Passes in hand, we toured around Kyoto, Nara and Osaka for cheap. So all we need to set aside are the entrance fees for the different shrines, temples, etc. But the great thing is, most of the entrance fees for some of the great tourist spots are free! I think I only shelled out ₱200 when I went to Osaka National Museum of Art. It would have been another ₱200 when we visited Kinkakuji (Golden Pavilion) but our good friend Irving took care of that (Thanks Irving!). But still, it’s just a couple of hundred pesos and the rest of them are free! Let me show you around:
Nara
I think this is at Kasuga TaishaNara ParkNandaimon GateThe five story pagoda near Kofukuji TempleOne of my most favorite shots by Doc IrvingSome cool background we foundEastern Golden HallPhoto OpSomewhere around Nara Park
Kyoto
Tenryuji TempleSomewhere around ArashiyamaArashiyama Bamboo Grove!Near the Togetsu-kyo BridgeFushimi Inari TaishaTorii gatesKinkakuji aka Golden Pavilion (₱200)
Osaka
DotonboriOsaka National Museum of Art₱200Osaka’s New World: Shinsekai
Food (it depends)
This is somewhat tricky because different people have different appetites. In my case, I can go having only two meals per day; but I’m always tempted to buy desserts (which can get a little expensive). And it also depends on your food choices because some restaurants are really pricey (like when we craved for katsu). Your best bet for a filling but inexpensive meal is at gyudon restaurants. It’s a good thing that everything is somewhat still fresh from my memory so I can give you a general food price guide when eating out in Japan.
Crab flavored piggy
Instant noodles [₱60-80]
Pwede na
Sandwiches at Family Mart/Lawson/7-11 [₱100-120]
Mcdo [₱150-200]
Best takoyaki (somewhere in Namba)
Takoyaki (6-8 pcs) [₱250-300]
Gyudon [₱150-200]
Ramen [₱300-500]
Mouthwatering okonomiyaki
Okonomiyaki [₱200-300]
Sosyal na chami
Soba [₱300-400]
Katsu meal set [₱500-600]
Lengua cone
Ice cream cones [₱150-200]
Souvenirs (₱400-500)
The above amount can buy you a keychain, maybe two fridge magnets, and one pouch of Kit Kat. So if you have a lot of friends and relatives requesting for their pasalubongs, or if you want to try all the different flavors of Kit Kat and other Japan goodies, adjust this amount accordingly.
And that’s it! So a sample itinerary would be:
Day 1 – Arrival at KIX (in our case we arrived at night)
Day 2 – Nara
Day 3 – Osaka (USJ)
Day 4 – Kobe
Day 5 – Kyoto
Day 6 – Osaka + Shopping
Day 7 – Departure
I hope this helps! Enjoy your Japan trip in the near future!
Haven’t done any blogging lately and I’m hating myself for it. It always crosses my mind but I wasn’t getting myself around to do it. I almost didn’t want to write now because I’m about to sleep already. My neurons are still kind of recuperating from the art class that I took this morning (I took an art class! Yay!). But so much stuff has been happening lately and I need to talk about it. I want my future self to go back and remember these things. Let’s have it as a list.
CANADA We’re done with our medical test and we passed! All we have to do now is wait for the passport request. Once we get notified of this, it means that they’re going to stamp our passports with PR visas (finally)! So keeping our fingers crossed for that. It’s kind of bittersweet though because that also means we’re leaving our families here in the Philippines. 😢 Oh well.
ART VENTURE I’m becoming more serious in pursuing my passion in art. Last week, I took my first ever art workshop about water brush calligraphy and it was a lot of fun. It was kind of bitin and pricey (Php 2,000 for 2 hours) but I enjoyed it. What I liked most about the experience is meeting the artist. I saw firsthand how she works and just listening to her tips and insights made me feel really good about this art venture. Seeing how good she is at what she does motivated me more to be as skilled as her. And then earlier this morning, as previously mentioned, I attended another workshop. This time, it’s about the fundamentals of drawing (Php 1,950 for roughly 5 hours). I guess I’d have to reserve a separate post for this because I’m thinking of writing every detail that happened today because it’s still fresh from my memory. To cut things short, I learned A LOT today. Didn’t think of actually being able to draw this (pictured below). I felt more confident than yesterday and I’m actually glad that I’m taking the necessary steps to improve my skills (even if it comes with a price). It’s definitely worth it! The instructor (Joms de Mesa) said something that I want myself to always remember. He said something along these lines, “If you were able to do this on your first try, just imagine what you can do if you keep on doing this for a year.” And that’s very true and a really good reminder to keep on going. To tie this all up together, I made an IG account dedicated to my art called @dust.designs (hence the title of this blog post). I hope to see a transition (from noob to expert) on my future posts so I need to keep on learning and practicing.
TRAVEL Hope everything goes well when we apply for our Japan visas next week. We’re hoping to go back there again this coming October. Nick should better be approved this time! I’m excited to stroll around the districts of Osaka then maybe go back to Kyoto. Not sure. Haven’t made an itinerary yet. I’m also looking forward to go visit some art stores in Japan. I hope I won’t get overwhelmed and start buying everything that looks kawaii. I also notice that most of the quality tools that’s being recommended in art blogs are from Japan, so I think I can buy it cheaper there. More better reasons to go back!
LIFE IN GENERAL I’m actually in good spirits right now. Mainly because of me trying to do the things I love like drawing, watercolor and some traveling. I feel happy whenever I produce a decent work and see myself improving. It’s an extra boost if I post it and somebody likes it (sometimes ❤️ or 😲 if I’m using Facebook 😄). Although in hindsight, I sometimes worry and think about some negative things. Thoughts like, “What are you planning to do with art? Are you going to get money from it? There’s a lot of people better than you.” and “Why do you keep on traveling? Traveling costs a lot of money. Do you have a lot of money? No you don’t! Why not save it instead and use it for things that really matter? You’re being selfish.” Stuff like that. I try not to think of these things because it dampens my mood and it demotivates me. I know that this “art thing” isn’t something that’s certain to make me earn money; but I’m loving every minute of it!What’s important is that I’m doing what I’m passionate about and for me, that matters. But it doesn’t mean that I’m going to quit my job (for now) and just do art. Of course I’ll keep my job (for now 😁) while doing stuff I like on the side. I’m just now in a state where I fully understand that life is really short. Yes, earning money is necessary to live. But making art and traveling is what I live for. For me, it gives more value and quality to my life. I’m just thankful that I finally know what I want to do. I felt very lost before. I was in a position where I’m very discontented and don’t know what I’m doing. I wan’t someone to tell me what to do and give me the answers because I have no clue what I’m supposed to be doing.
And then, just like magic, I finally figured out who that someone is. That someone who will give me the answers. Me. Finally, I was able to figure it out. And I’m not gonna stop now.
My logo!
Okay, that’s it. Got kind of emotional back there. Haha. I hope I can blog more frequently. I almost forgot that writing feels soothing and therapeutic. It also keeps my mind in the right perspective. Until then!
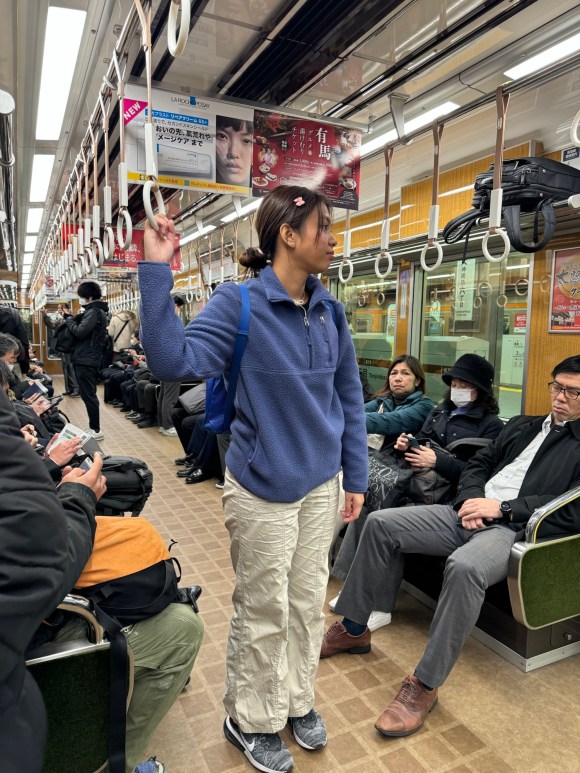
We arrived in Tokyo at around 7 AM. Our stop will be at Shinjuku. From there, we’ll figure out how to get to our next Airbnb accommodation. Our host sent us very clear instructions on how to get to their house from Oshiage station. Navigating around Japan gets easier and easier because we’re getting used to their transportation network. But we also learned to immediately ask questions when we find ourselves utterly dumbfounded.
Eto na yung dalwa na sooobrang prepared sa pagpunta nilang Japan. *eye roll*
We bumped into them when we went out to buy some food in McDo. It was probably around 9PM. They looked so tired and hungry. Pretty much like us on our first day in Japan. 😂
Two of the things that I’m looking forward to see in Japan is right here in Kyoto. The moment I saw pictures of the Arashiyama Bamboo Grove and the torii gates in Fushimi Inari-taisha, I was completely blown away. I can’t wait to witness them with my own eyes.
Hello Kyoto
When we reached Arashiyama, I had no idea that it was a huge place with many shrines and temples scattered around the area. The place is so zen. On our way there, I thought that this was just the location of the bamboo grove that I’m so eager to see. When we saw the map (given to us by a personnel at the train station), we saw the different tourist spots that we could check out before we can reach the bamboo forest.
The map
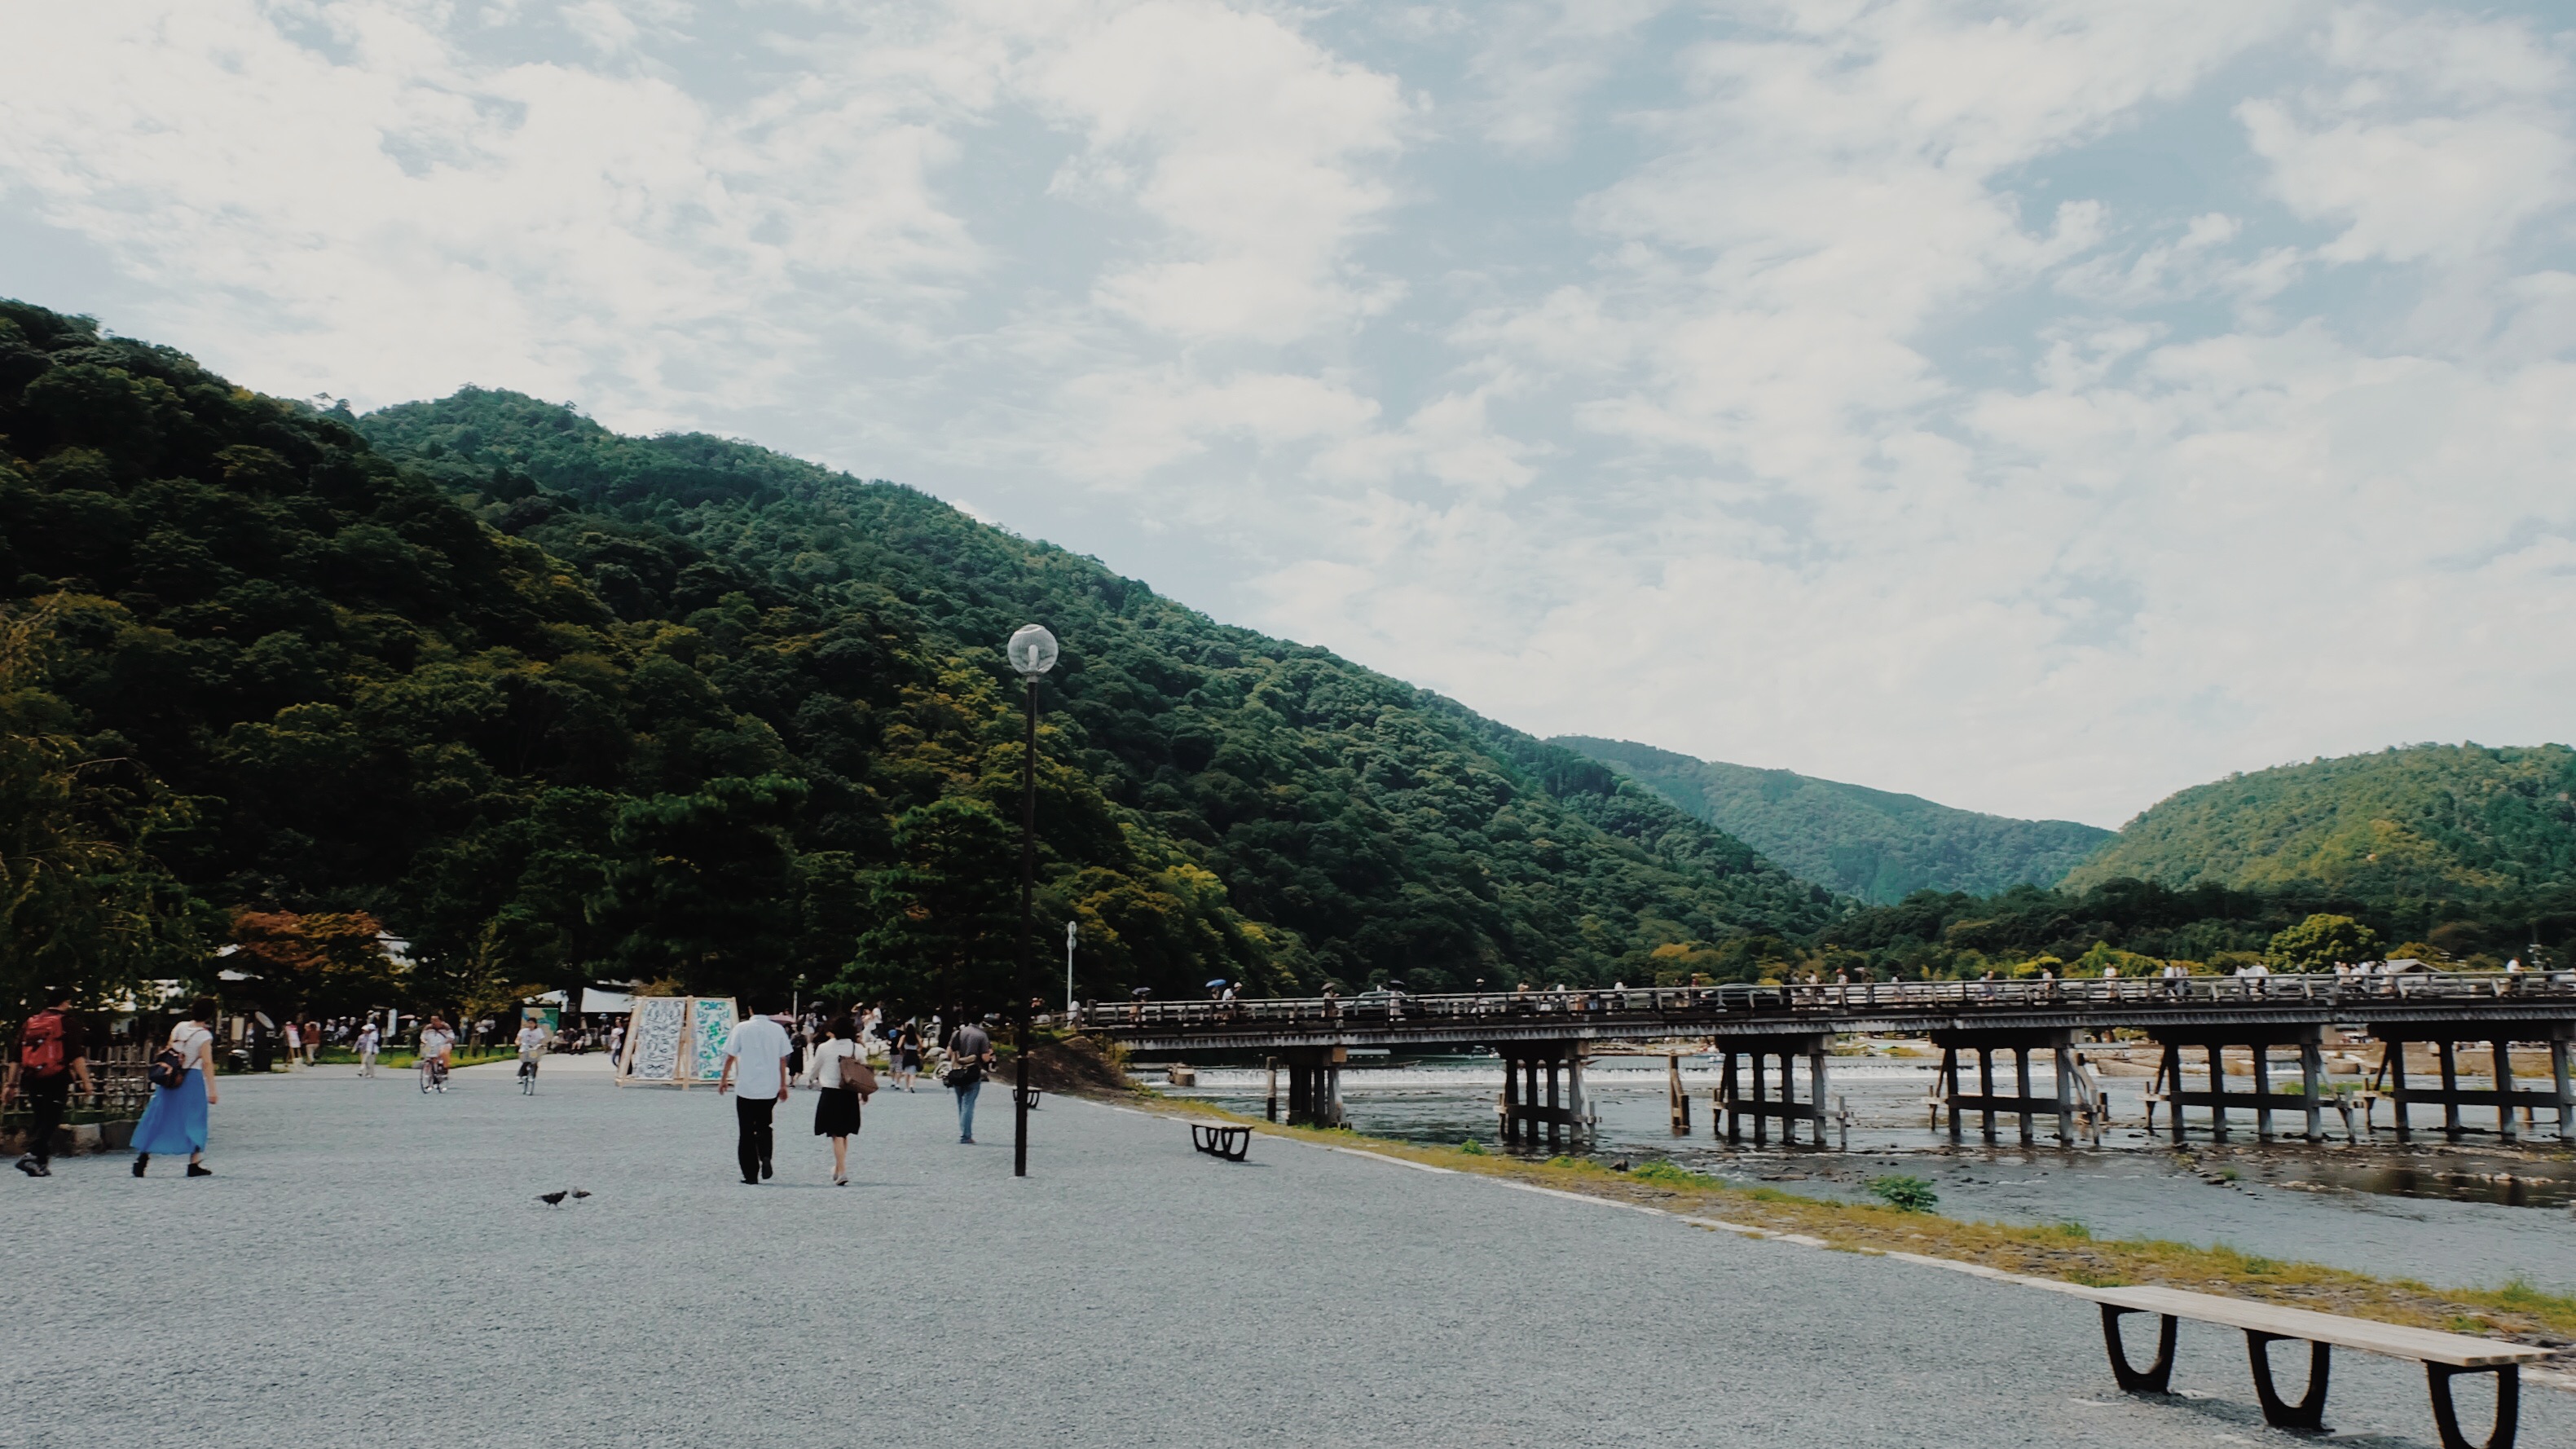
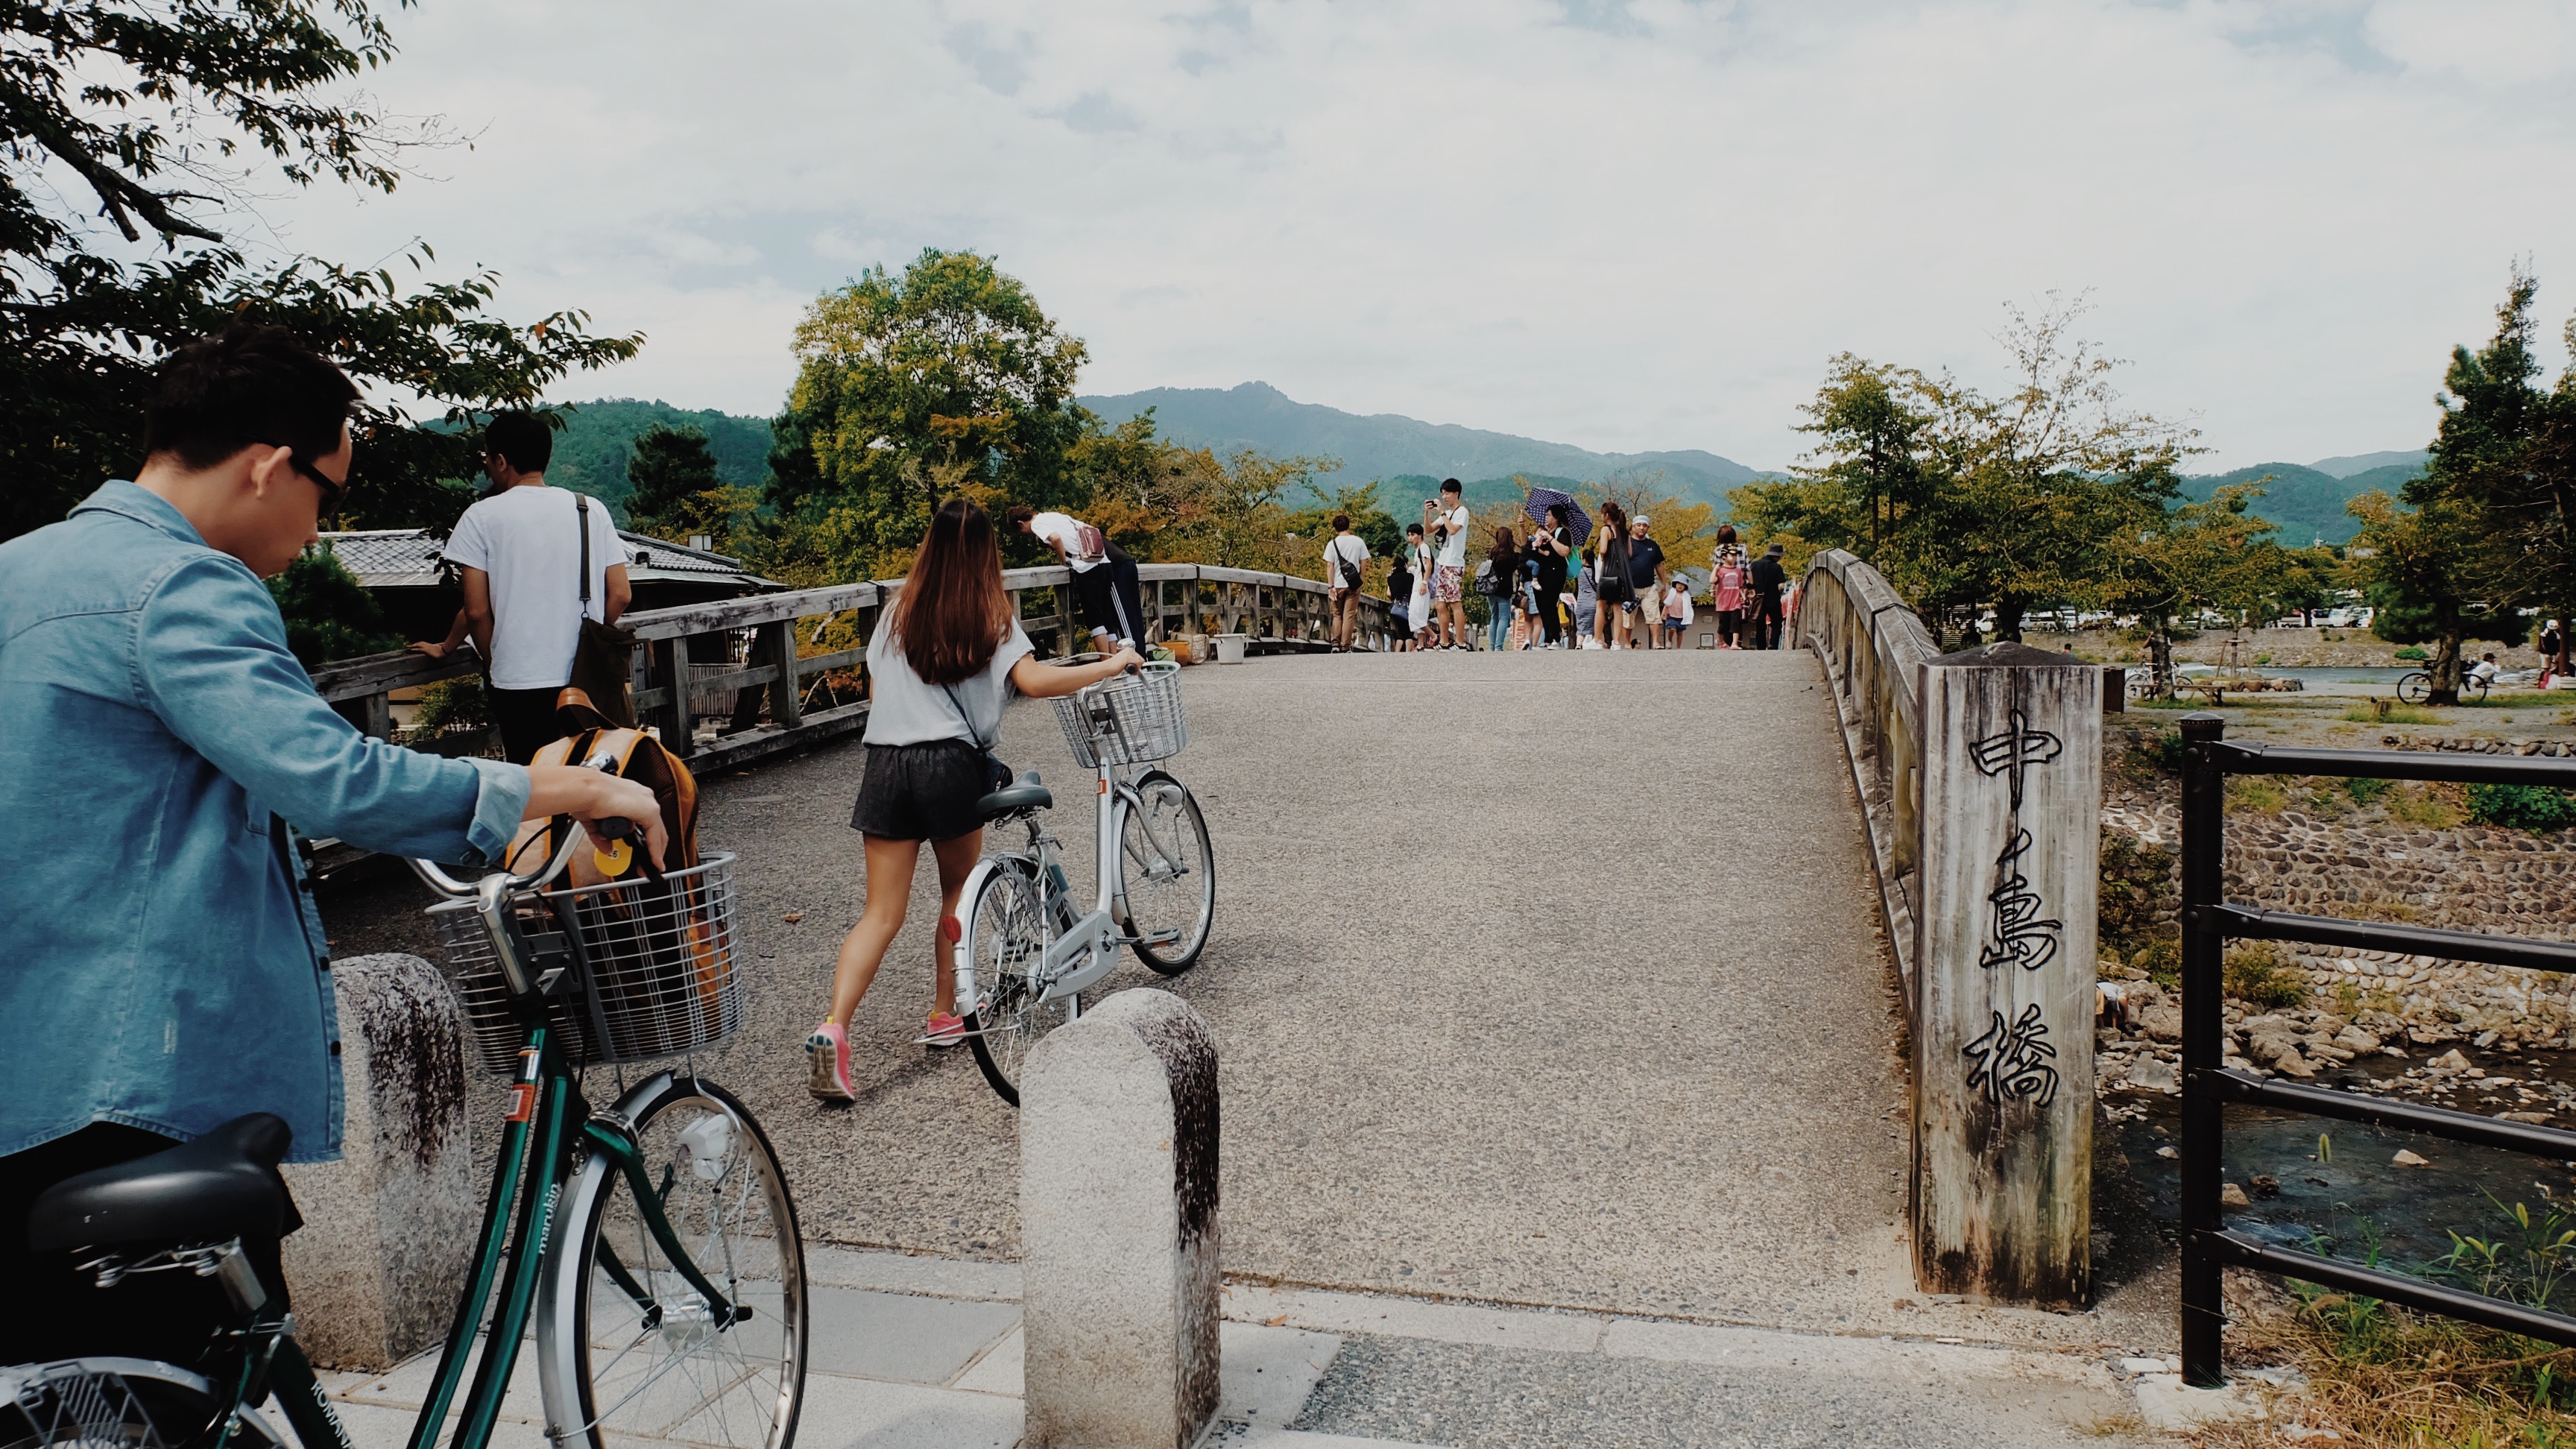
First, you will be greeted by this bridge.
Togetsu-kyo Bridge
Wishing it was fall
History Tidbit #1:
This bridge is 400 years old.
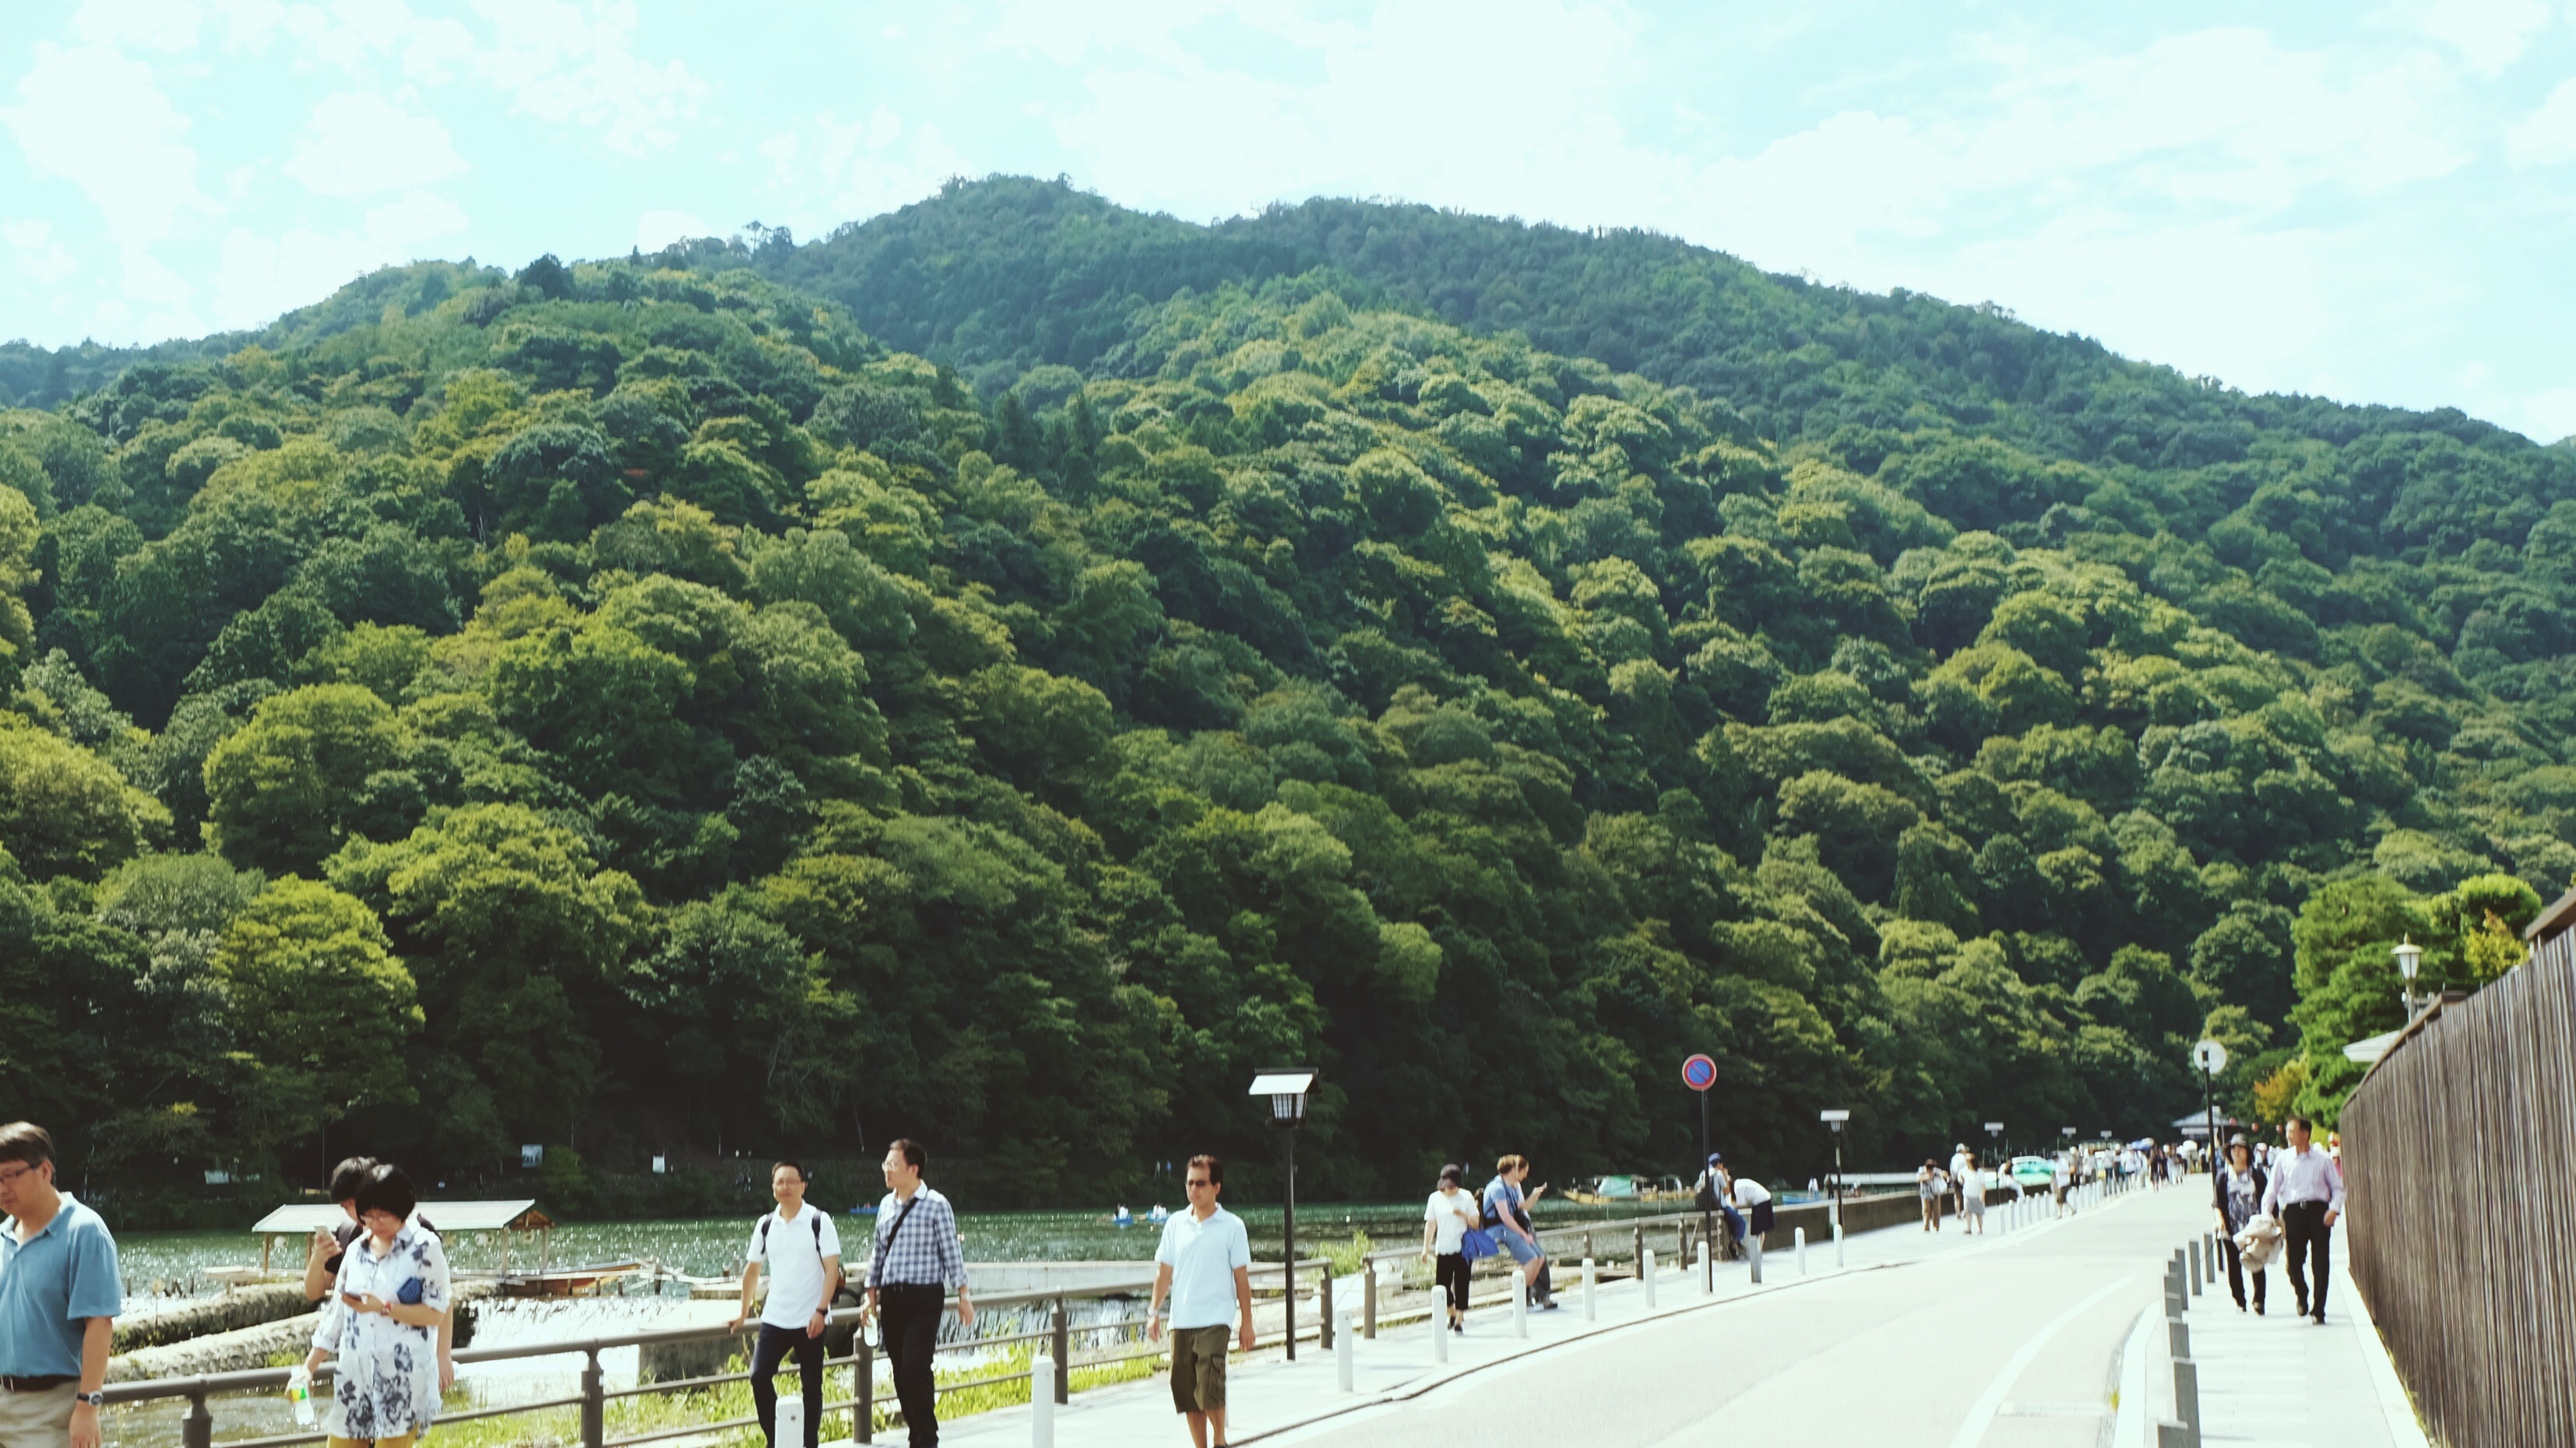
That lush greenery
I want to go back here during the fall season. I want all these greens to turn into oranges and reds.
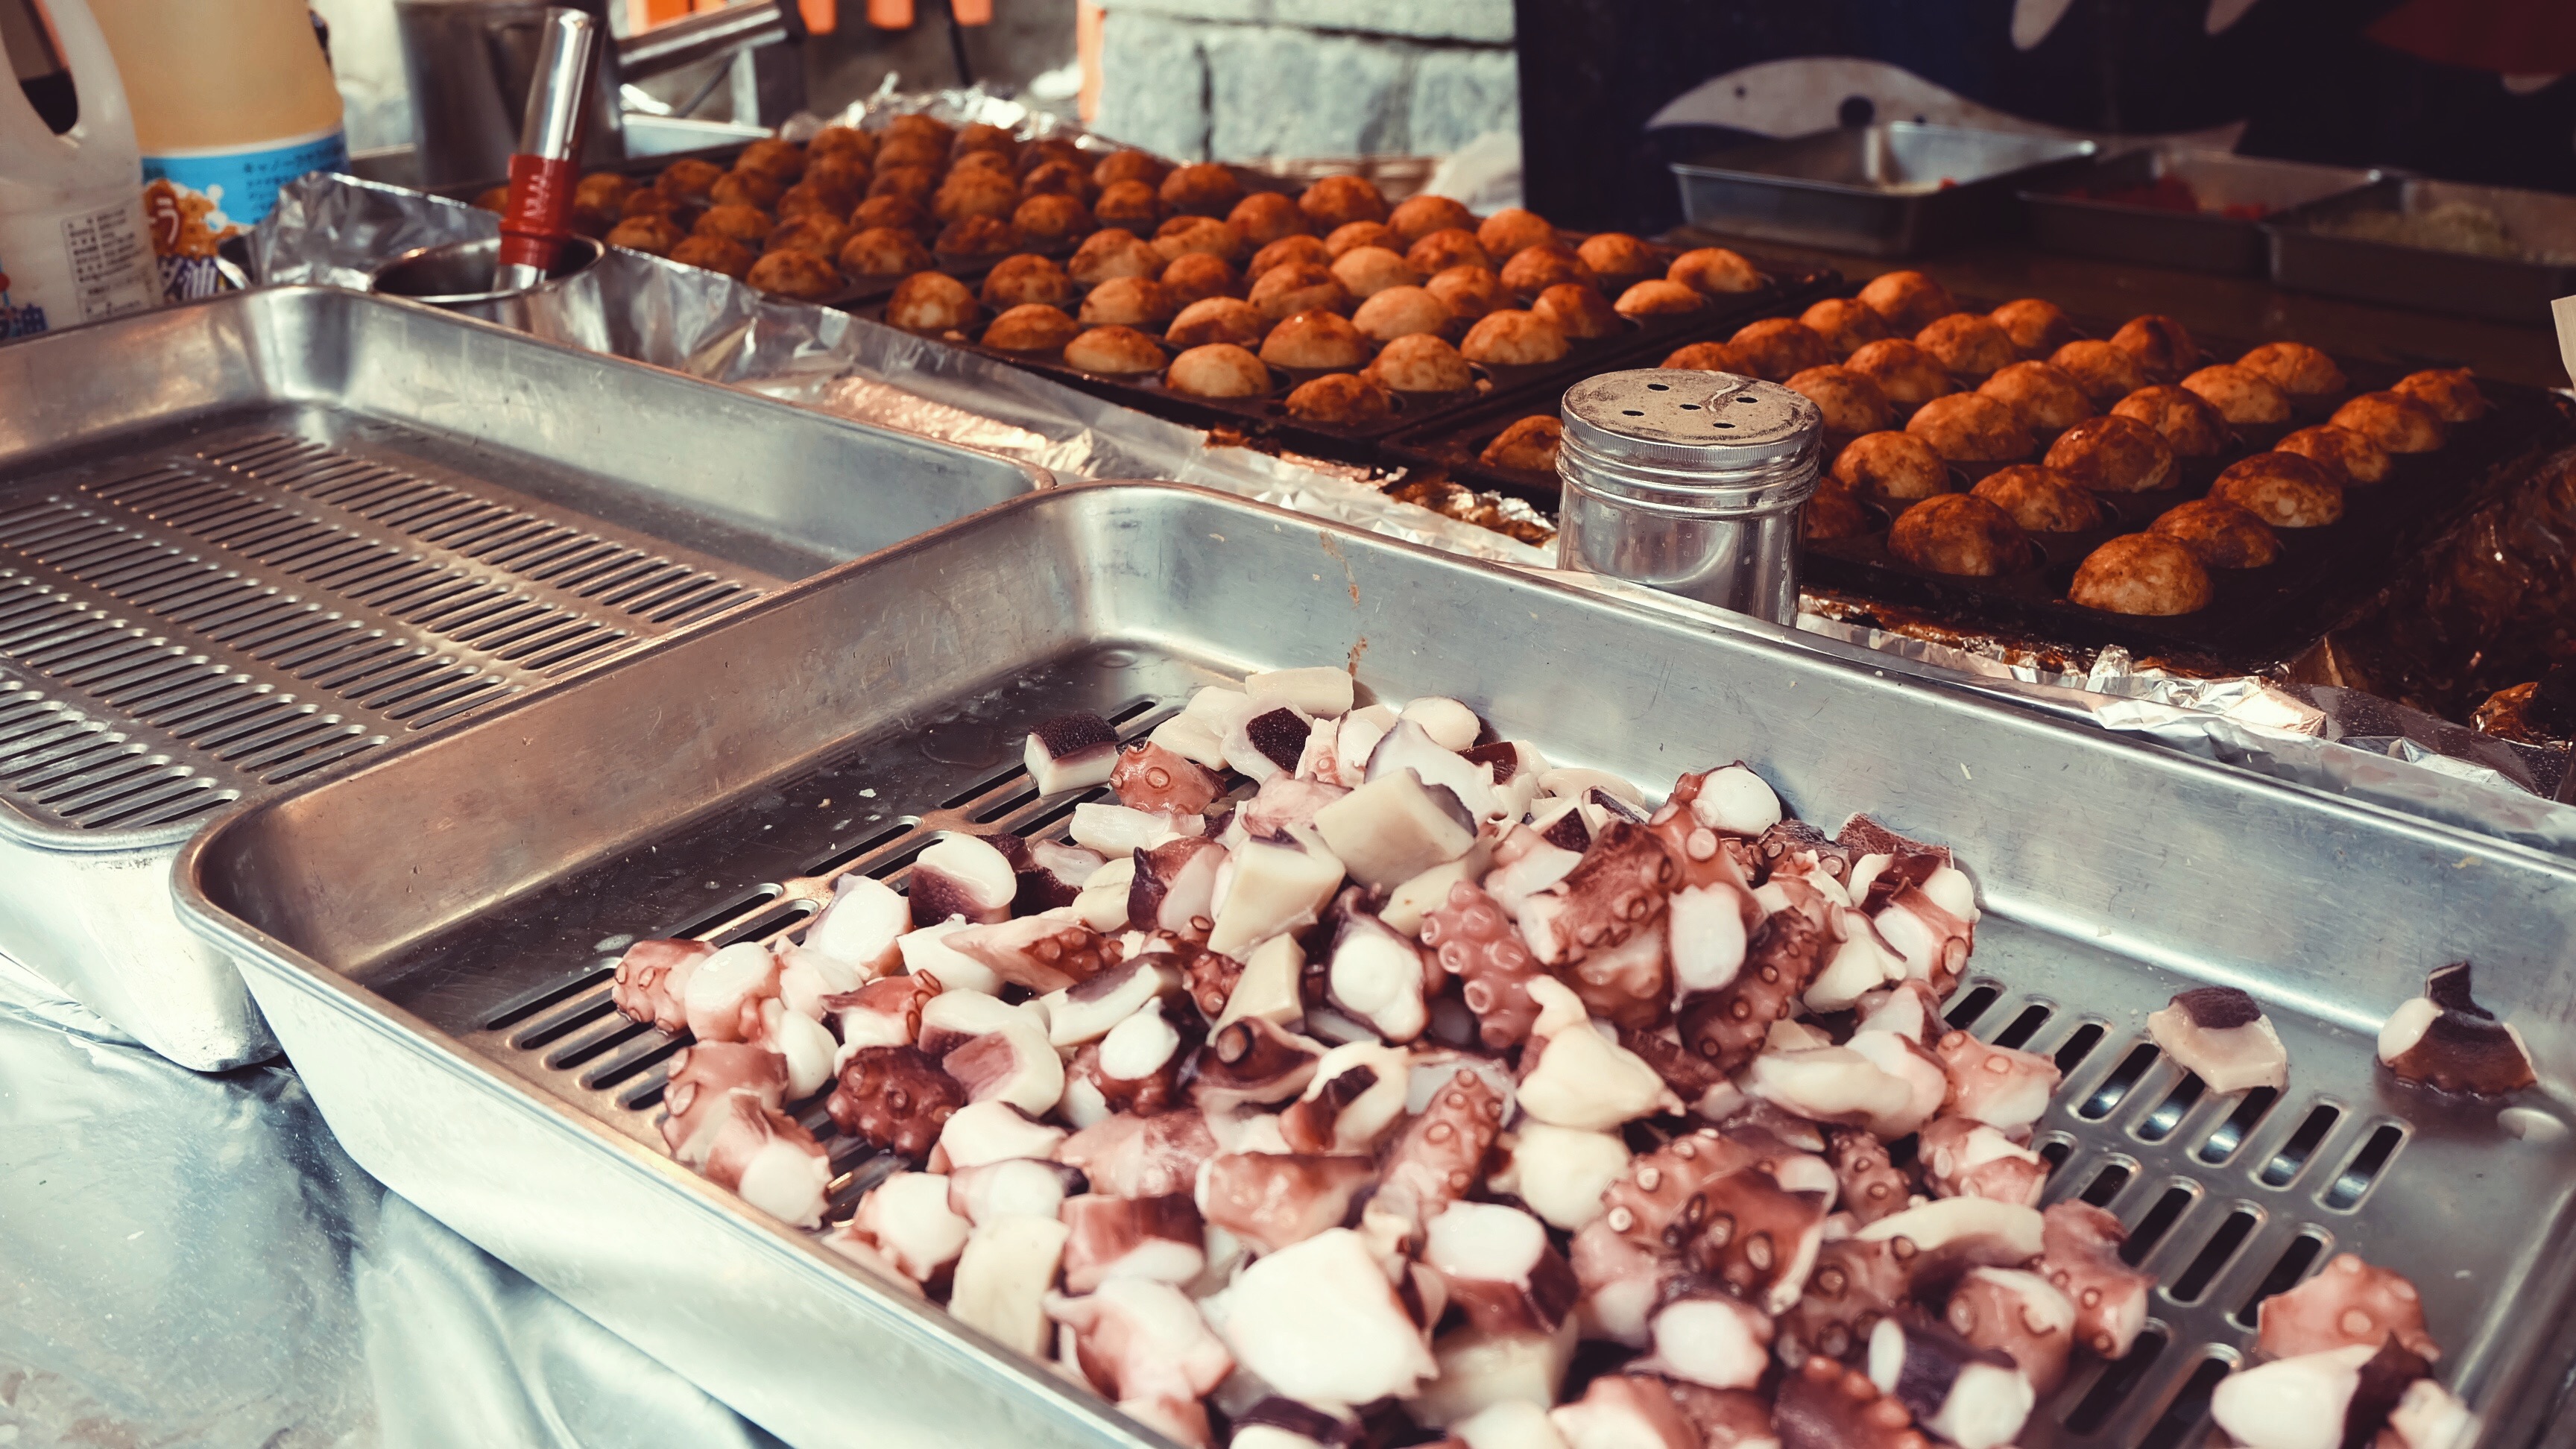
Everything about this place spells “chill”Takoyaki at last!Big octopus chunksTakoyaki by the river
On our way to Arashiyama Bamboo Grove, we got lost. We couldn’t figure out how to get there it was so frustrating. We tried asking questions and this lady was very patient explaining to us the directions. With the map in hand and the lady’s instructions, we still couldn’t seem to figure it out. The lady advised us to enter the Sogenchi Garden (for an entrance fee of 250 pesos each) and from there we could make our way to the bamboo grove. But some other person was pointing us to a different direction. Turns out, there are two routes going to the bamboo grove. One is through the garden (for a fee) and the other one doesn’t require us to pass through a temple or garden (which means no entrance fees) but it’s much farther.
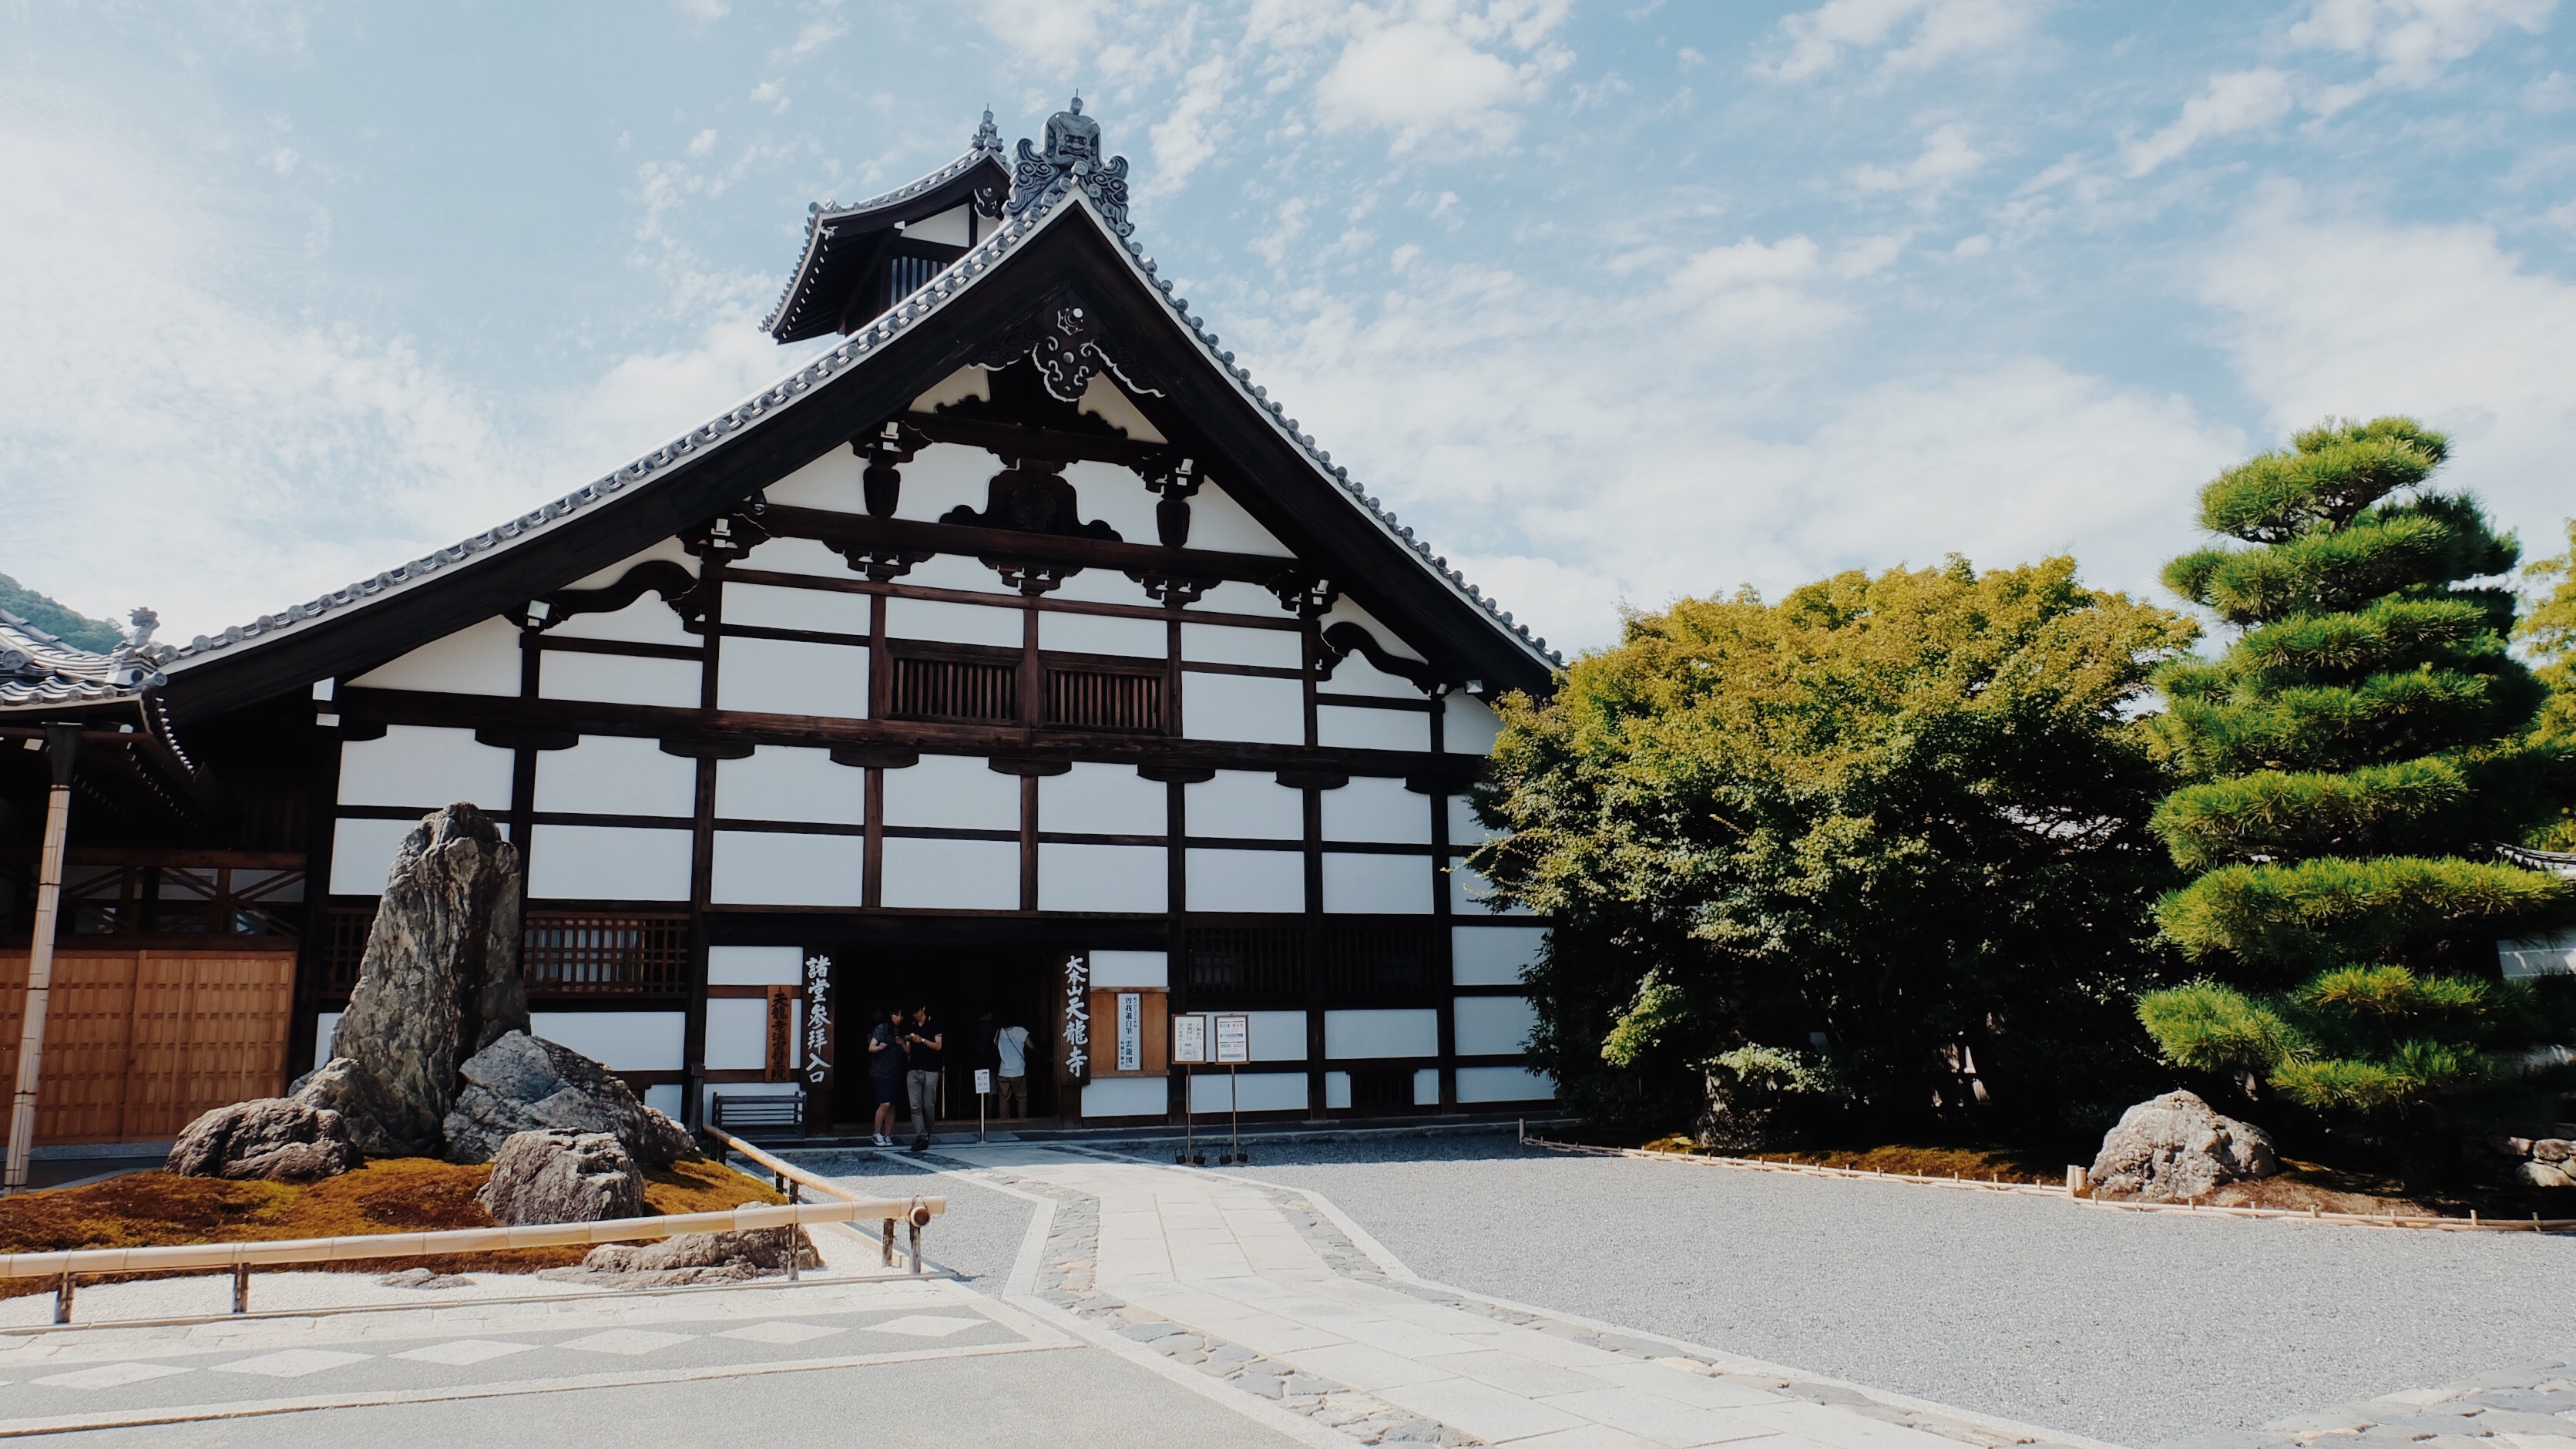
Tenryu-ji Temple
aka Temple of the Heavenly Dragon
History Tidbit #2:
One of the UNESCO World Heritage Sites in Kyoto. This temple is said to be caught in fire several times (8 times to be exact) and underwent major reconstructions through the years.
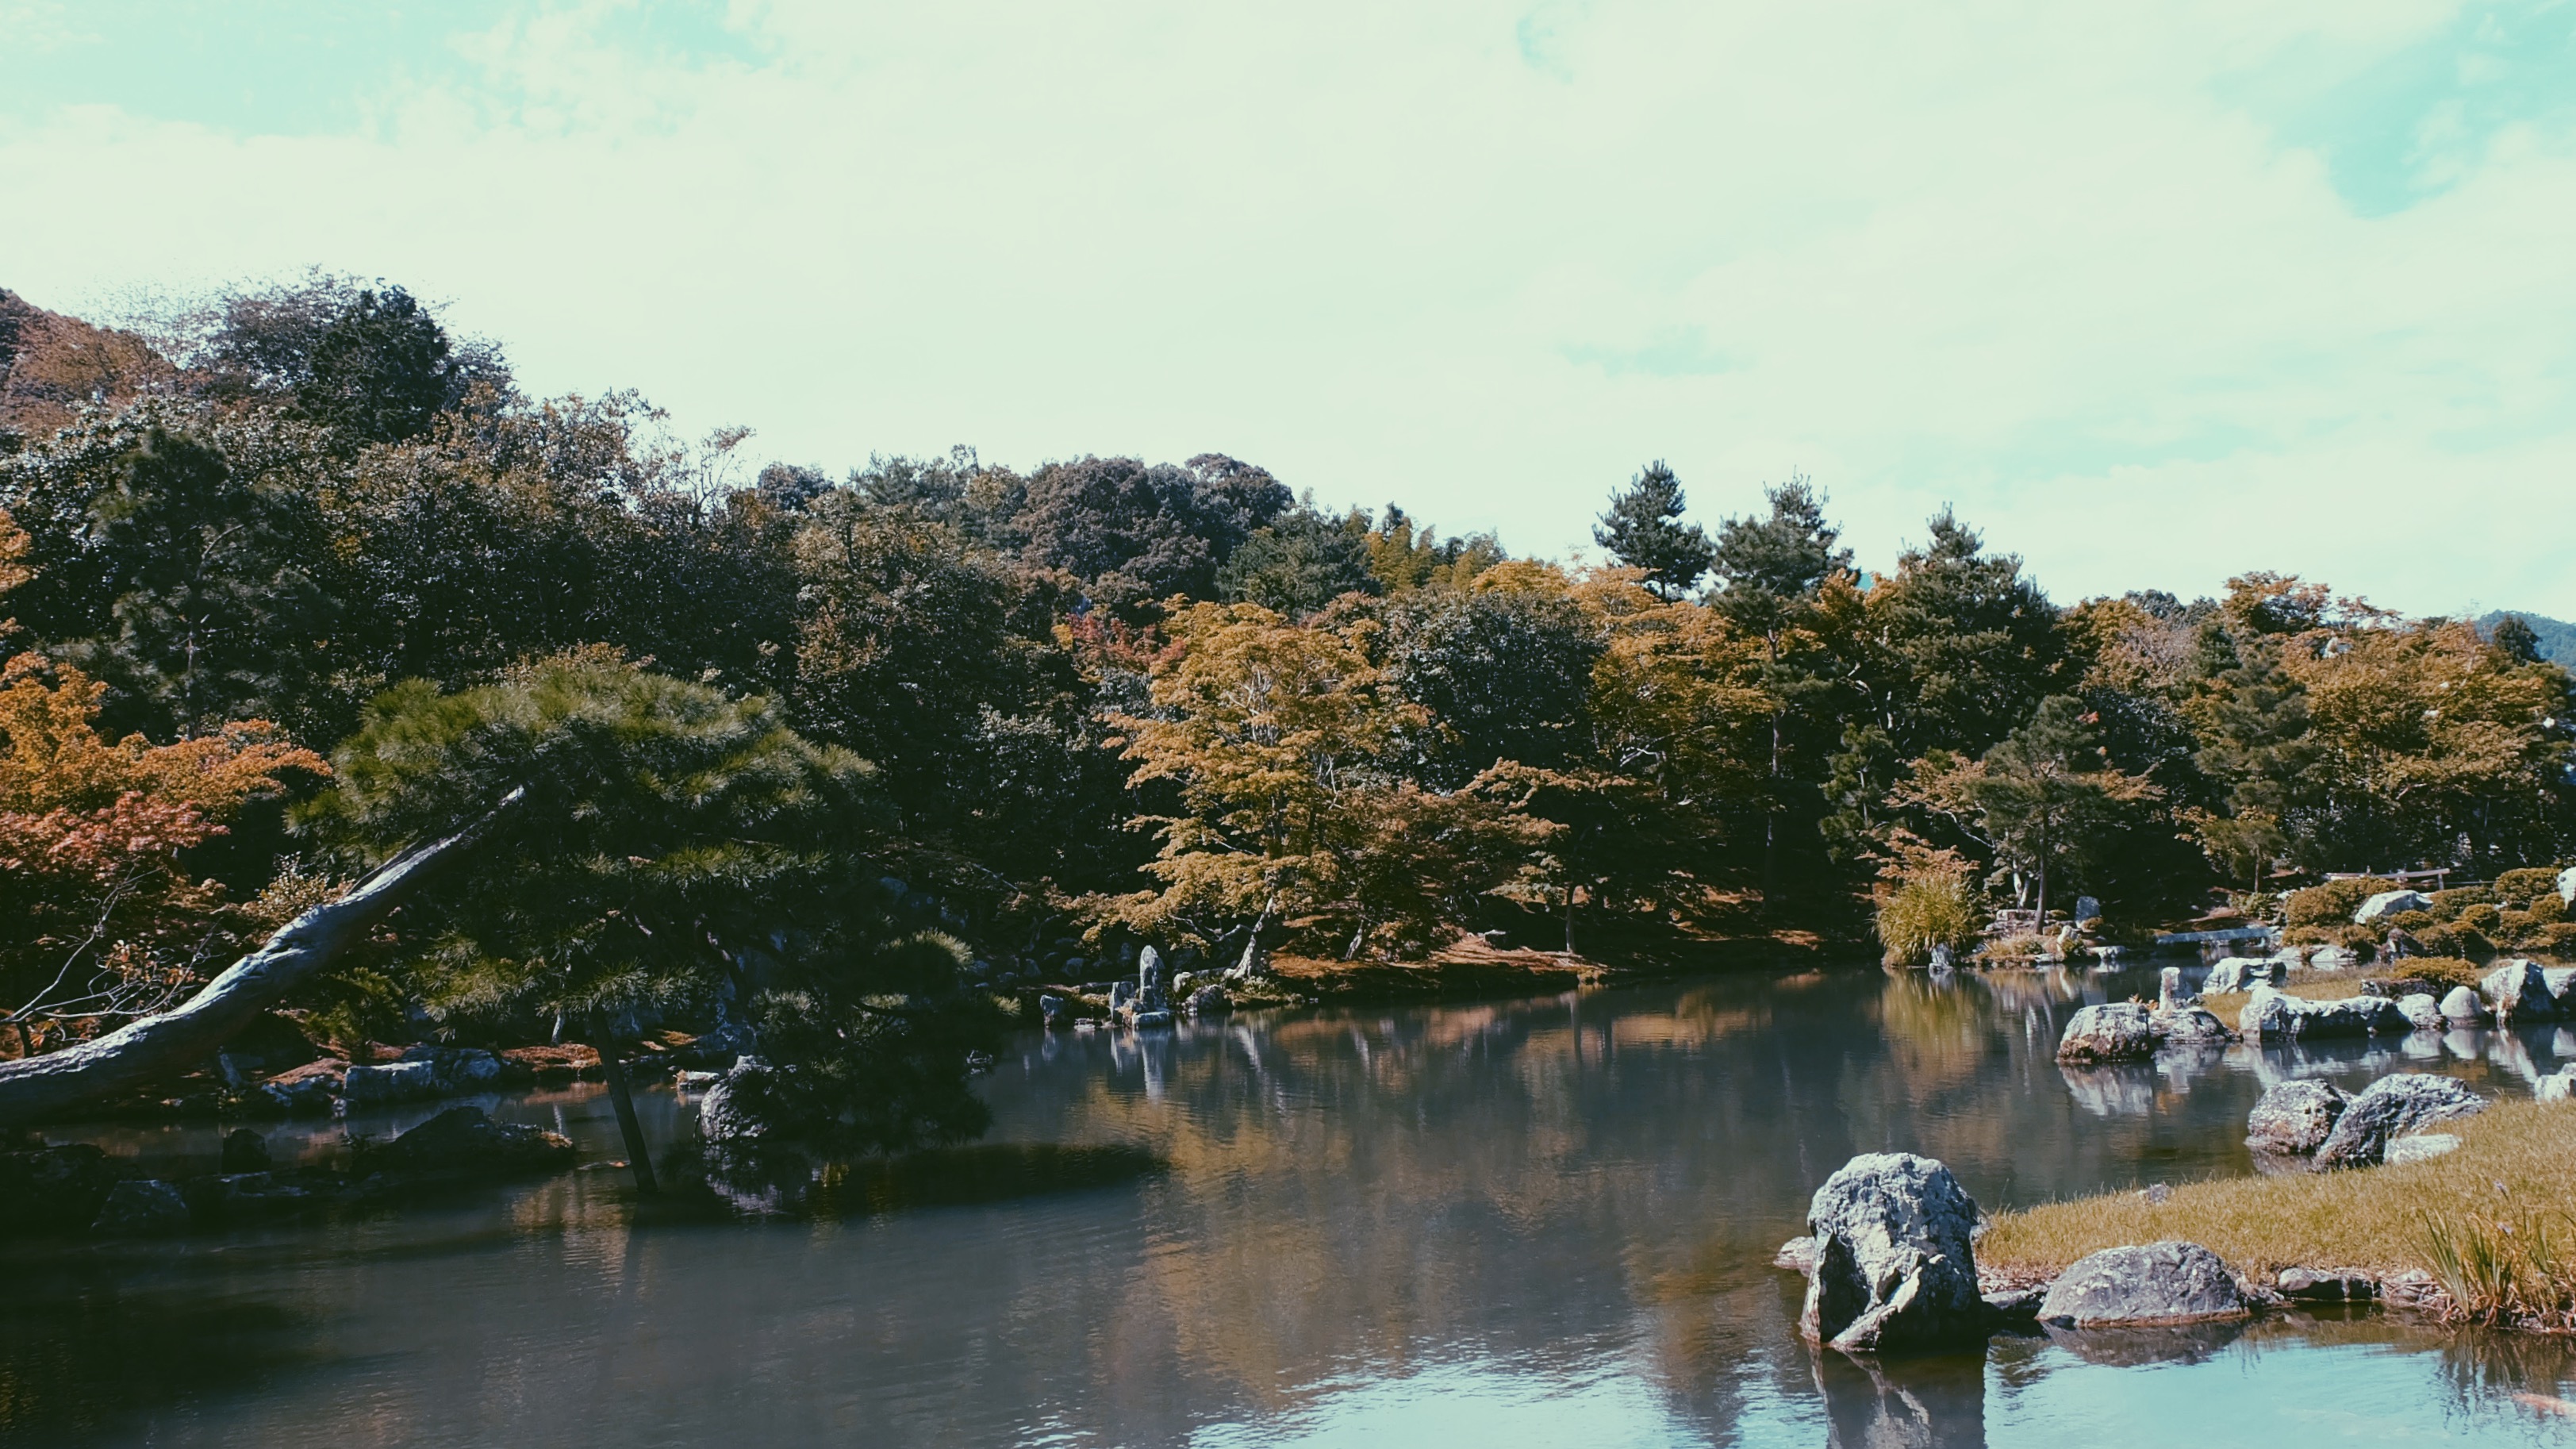
So clearly, we chose the shorter route and bought entrance tickets to the garden. It was a good decision because we get to see a UNESCO World Heritage Site and the Sogenchi Garden is breathtaking. It looks very calm and peaceful. This garden is a piece of art.
Sogenchi Garden
Perfect place to do some meditation or yoga
History Tidbit #3:
For 700 years, Sogenchi Garden retained it’s original form since it was laid out in the 14th century.
At this point, we were still having an argument. I was so pissed at Kenneth because he easily becomes irritable whenever we get lost. Getting lost is part of the travel! And if I’m going to get lost, I’d rather get lost in Japan. There are so many interesting things to see along the way. He’s so focused on getting to our destination that he can’t seem to appreciate that we are in a different country and that we are being surrounded by things that we can no longer come across once we go back to the Philippines. And if we didn’t get lost, we wouldn’t be able to see this:
No idea what this is but I find it cool
He kind of settled down and maybe realized that I’m right (?). But that’s how we are. We argue, then we laugh it off. Sabi ko sa kanya:
“Wag ka kasing mataray.”
“Ikaw din naman mataray. Wag kang mataray.”
“Eh mataray nga ako.”
“Eh mataray nga din ako.”
Then we find ourselves laughing. It’s basically our everyday life in Japan.
Photos before reaching the bamboo grove:
We thought this was it but it isn’t. But we are sooo close.Tempted to buy some charmsSo relieved to see some kind of gazebo to sit and get a short break from all the walkingWe’re almost there!
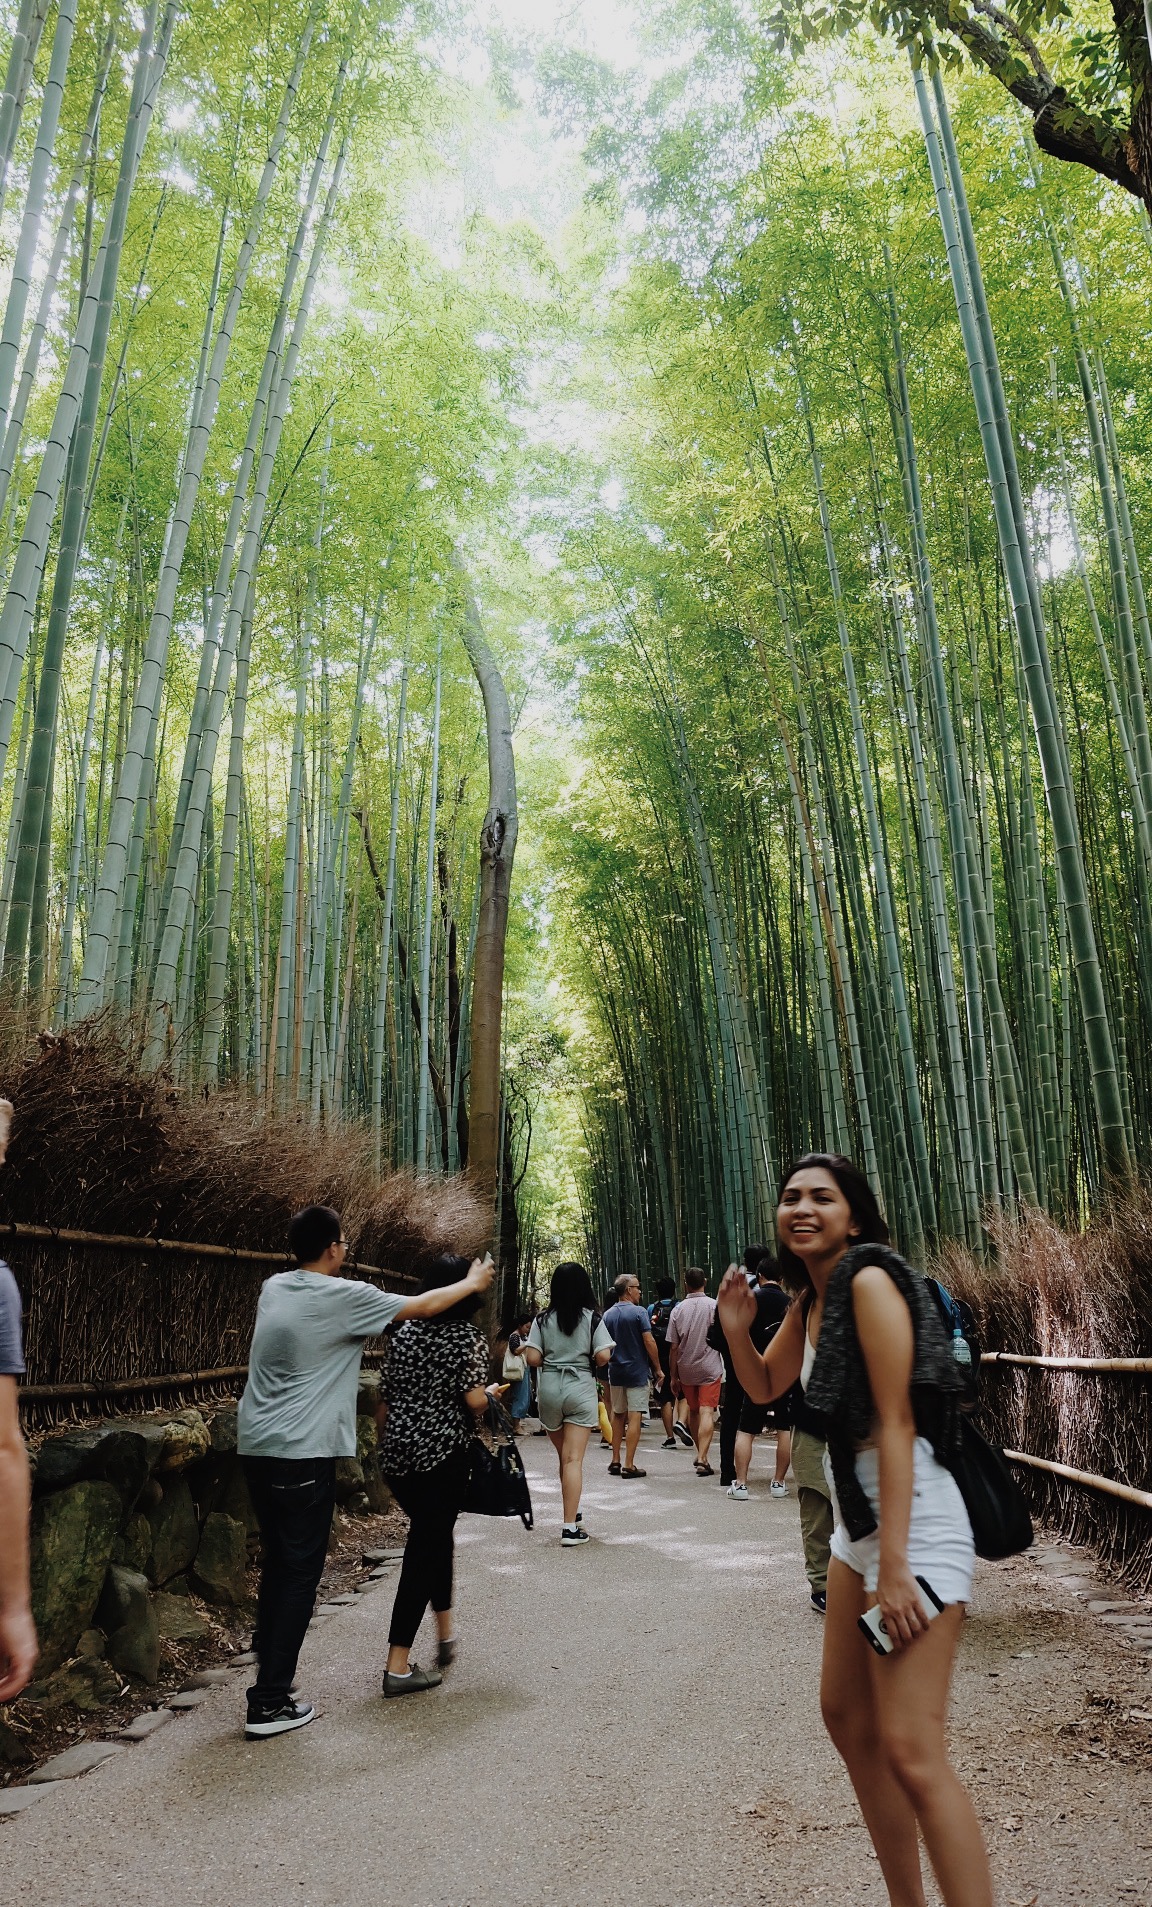
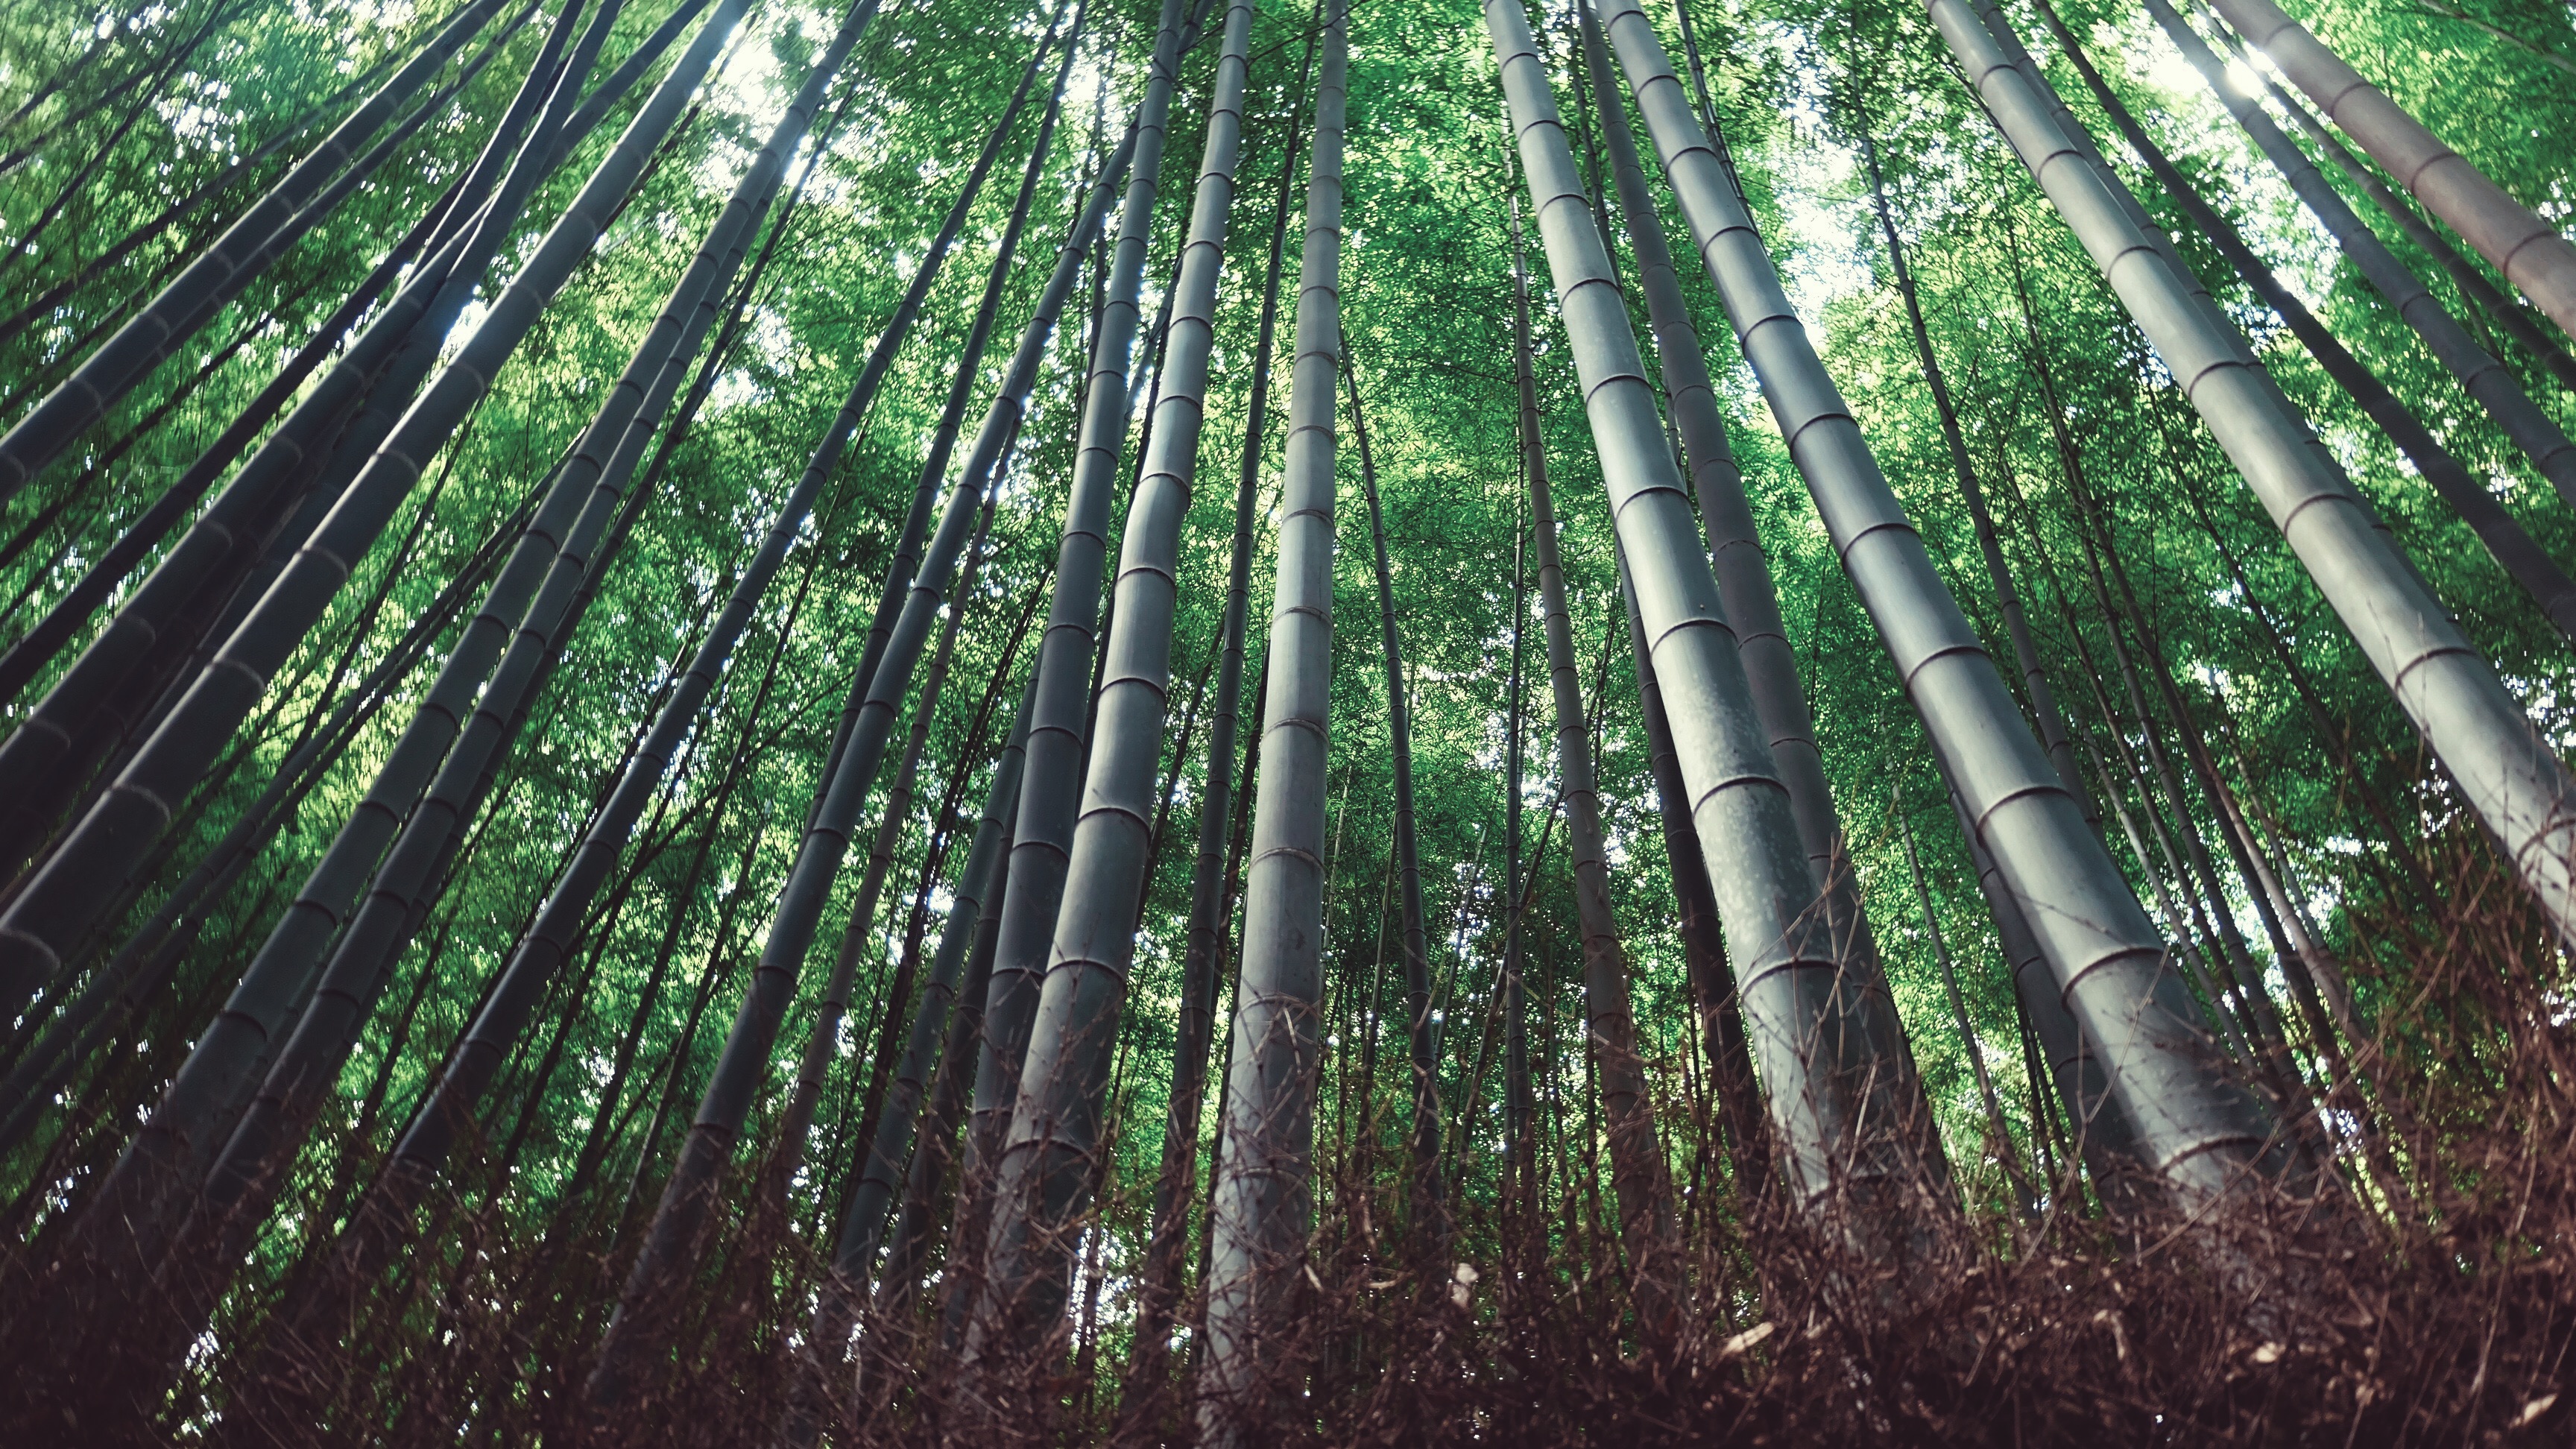
Arashiyama Bamboo Grove
* huge heart eyes *
AT LAST! The long, tiring walk and all those petty fights are so worth it! Kenneth was completely amazed. Kenneth’s not really expressive so when he likes something that I like, it makes me doubly happy.
Can’t contain my happinessWhen you look upBamboo heaven
It is true. No photo can capture the feeling of standing in the midst of this bamboo grove. ❤️
I can look at this all day
As much as I want to assemble a tent and practically live here, it’s already time to go to our second destination. Some interesting things we saw while heading to the train station that will take us to Fushimi Inari-taisha:
Wooden dragonfly makerNow I look back and think that I should have bought one. This could have been a great souvenir (or those charms perhaps).Monks?
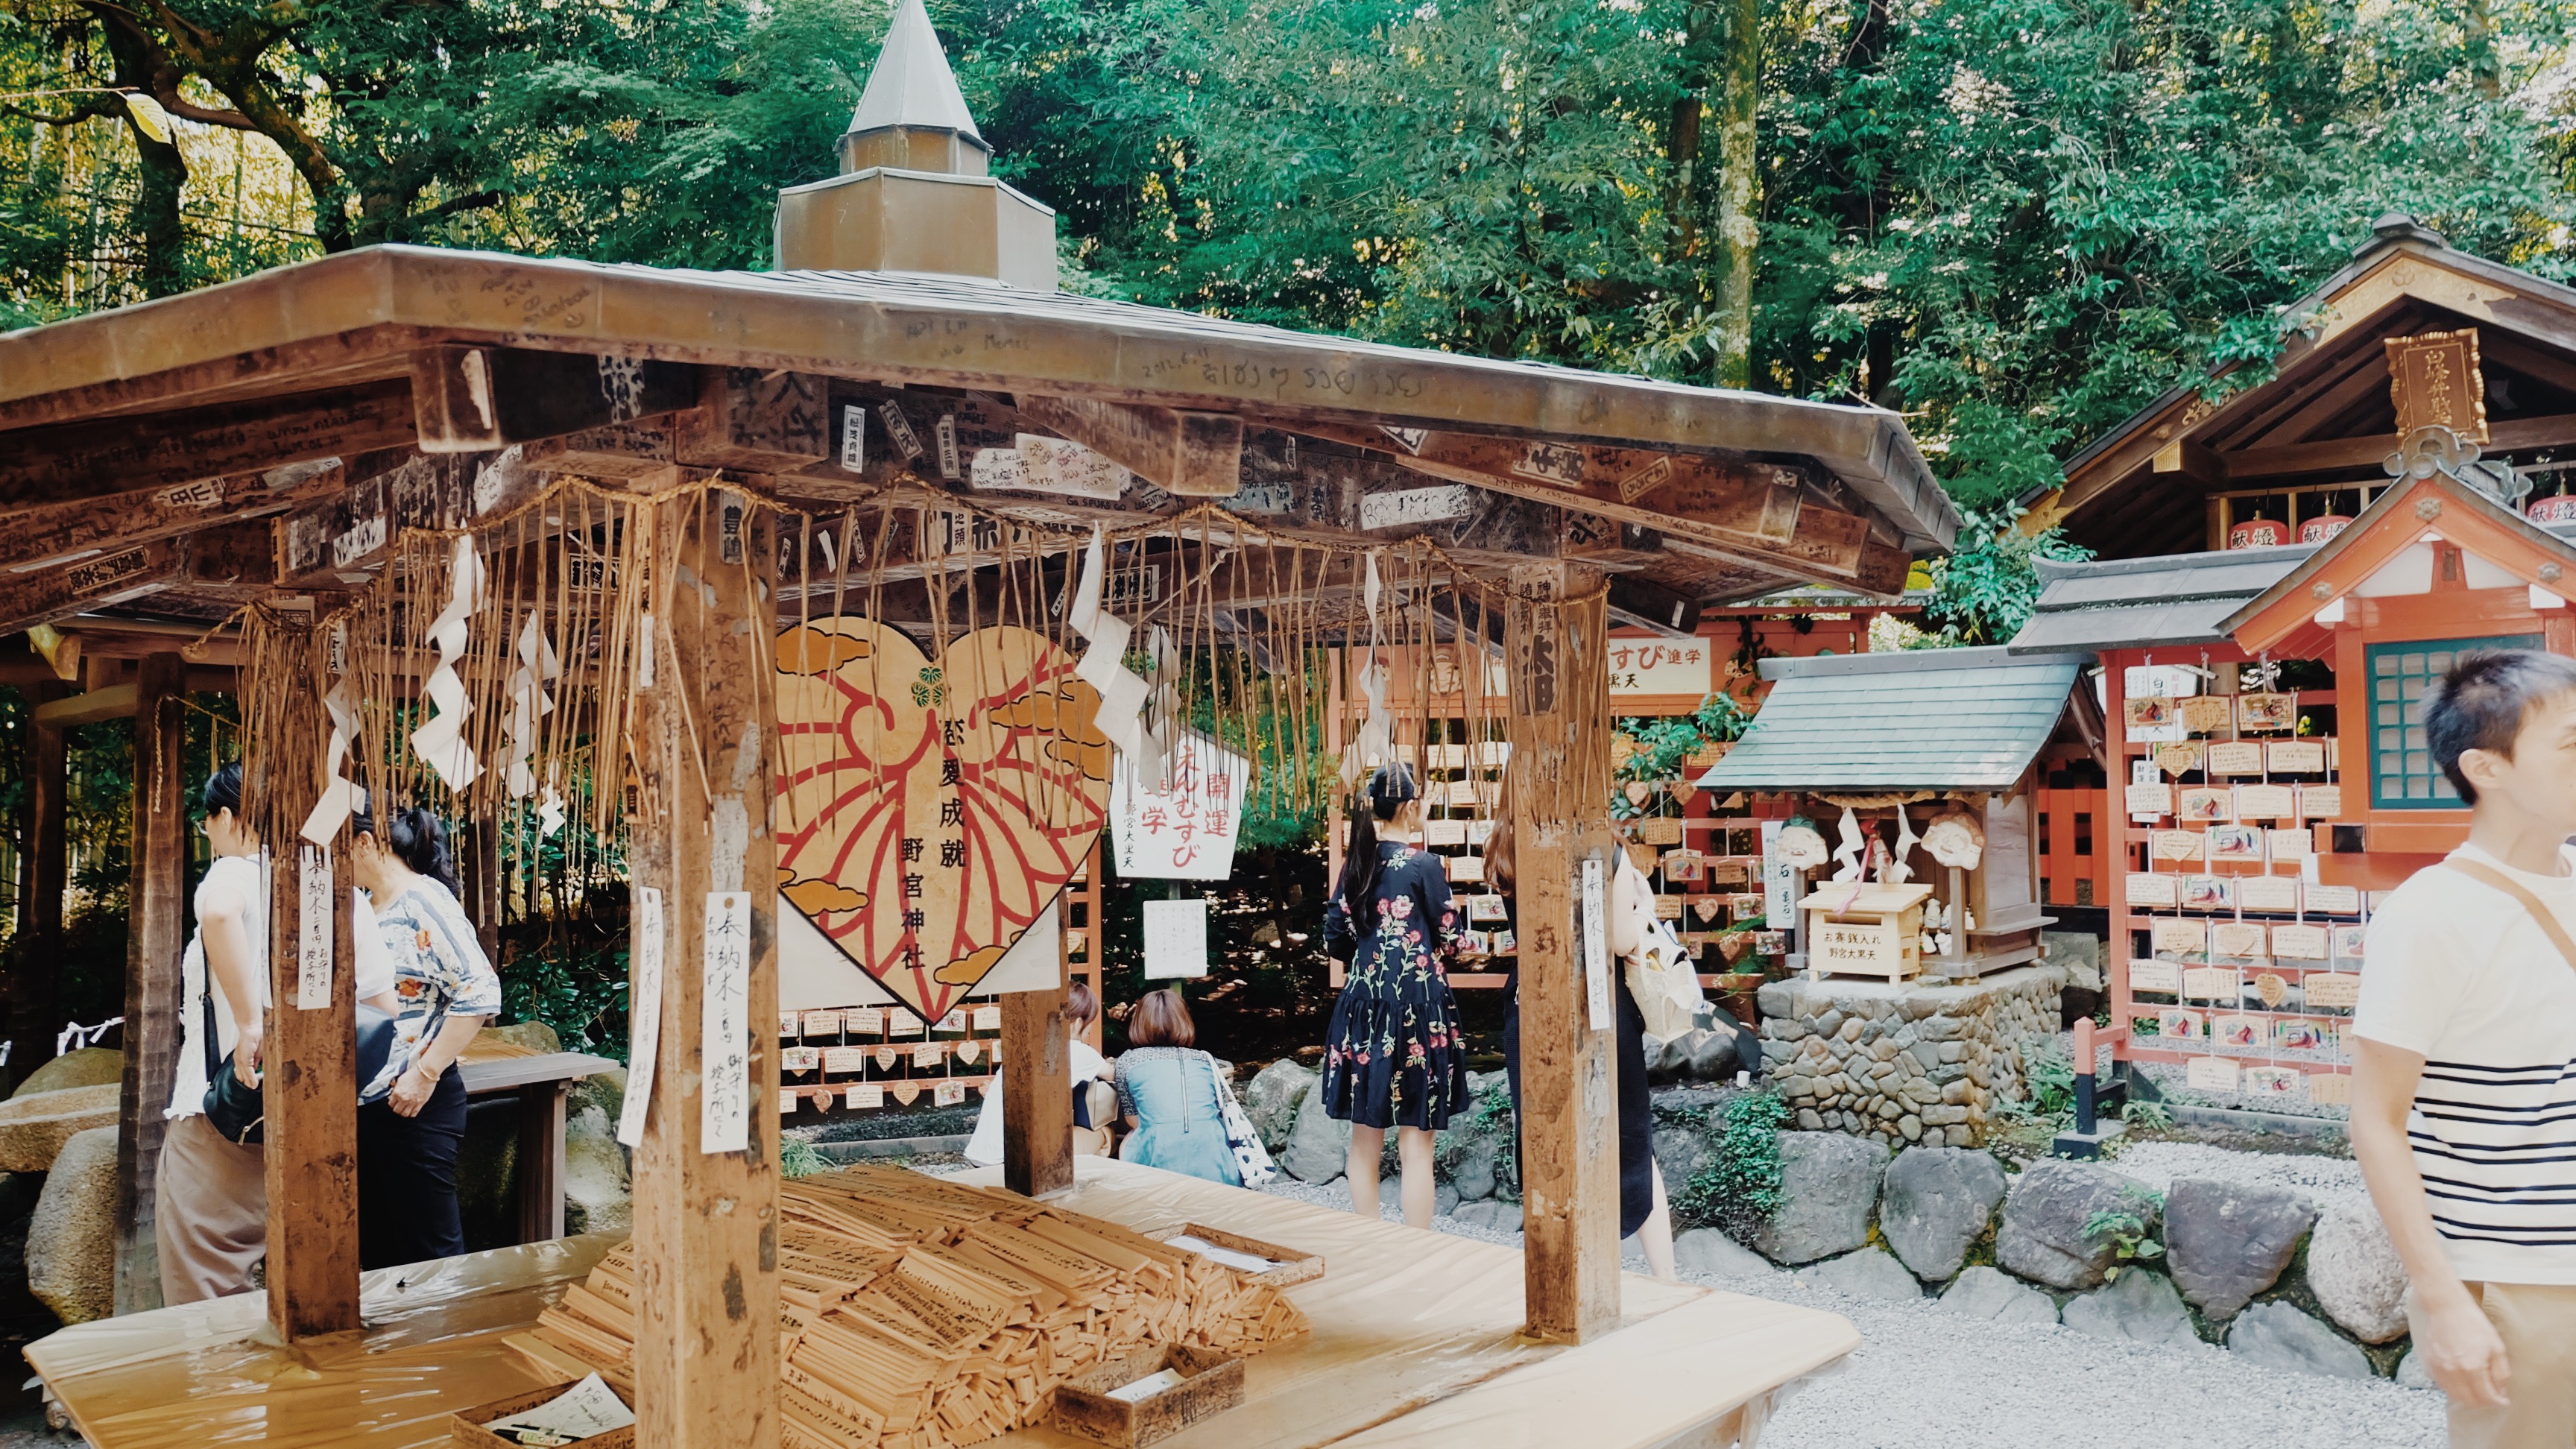
We stumbled upon many shrines but this one is free to enter.
Nonomiya Shrine
So zenWishes and prayers hung on wooden plates (wooden plates not free)“Sana magustuhan na tayo ng mga crush natin”Envied these guys. We were so DEAD tired at this point.
I’m not quite happy with how I approached our trip overall. I wasn’t able to take it all in and truly experience these historic sites around me. I’m more focused on getting great pictures that I forget to stop and savor it all. All those history tidbits, I only learned about it when I tried Googling all the places that we went to. It would be so much better if I knew the meaning and the story of what’s right in front of me.
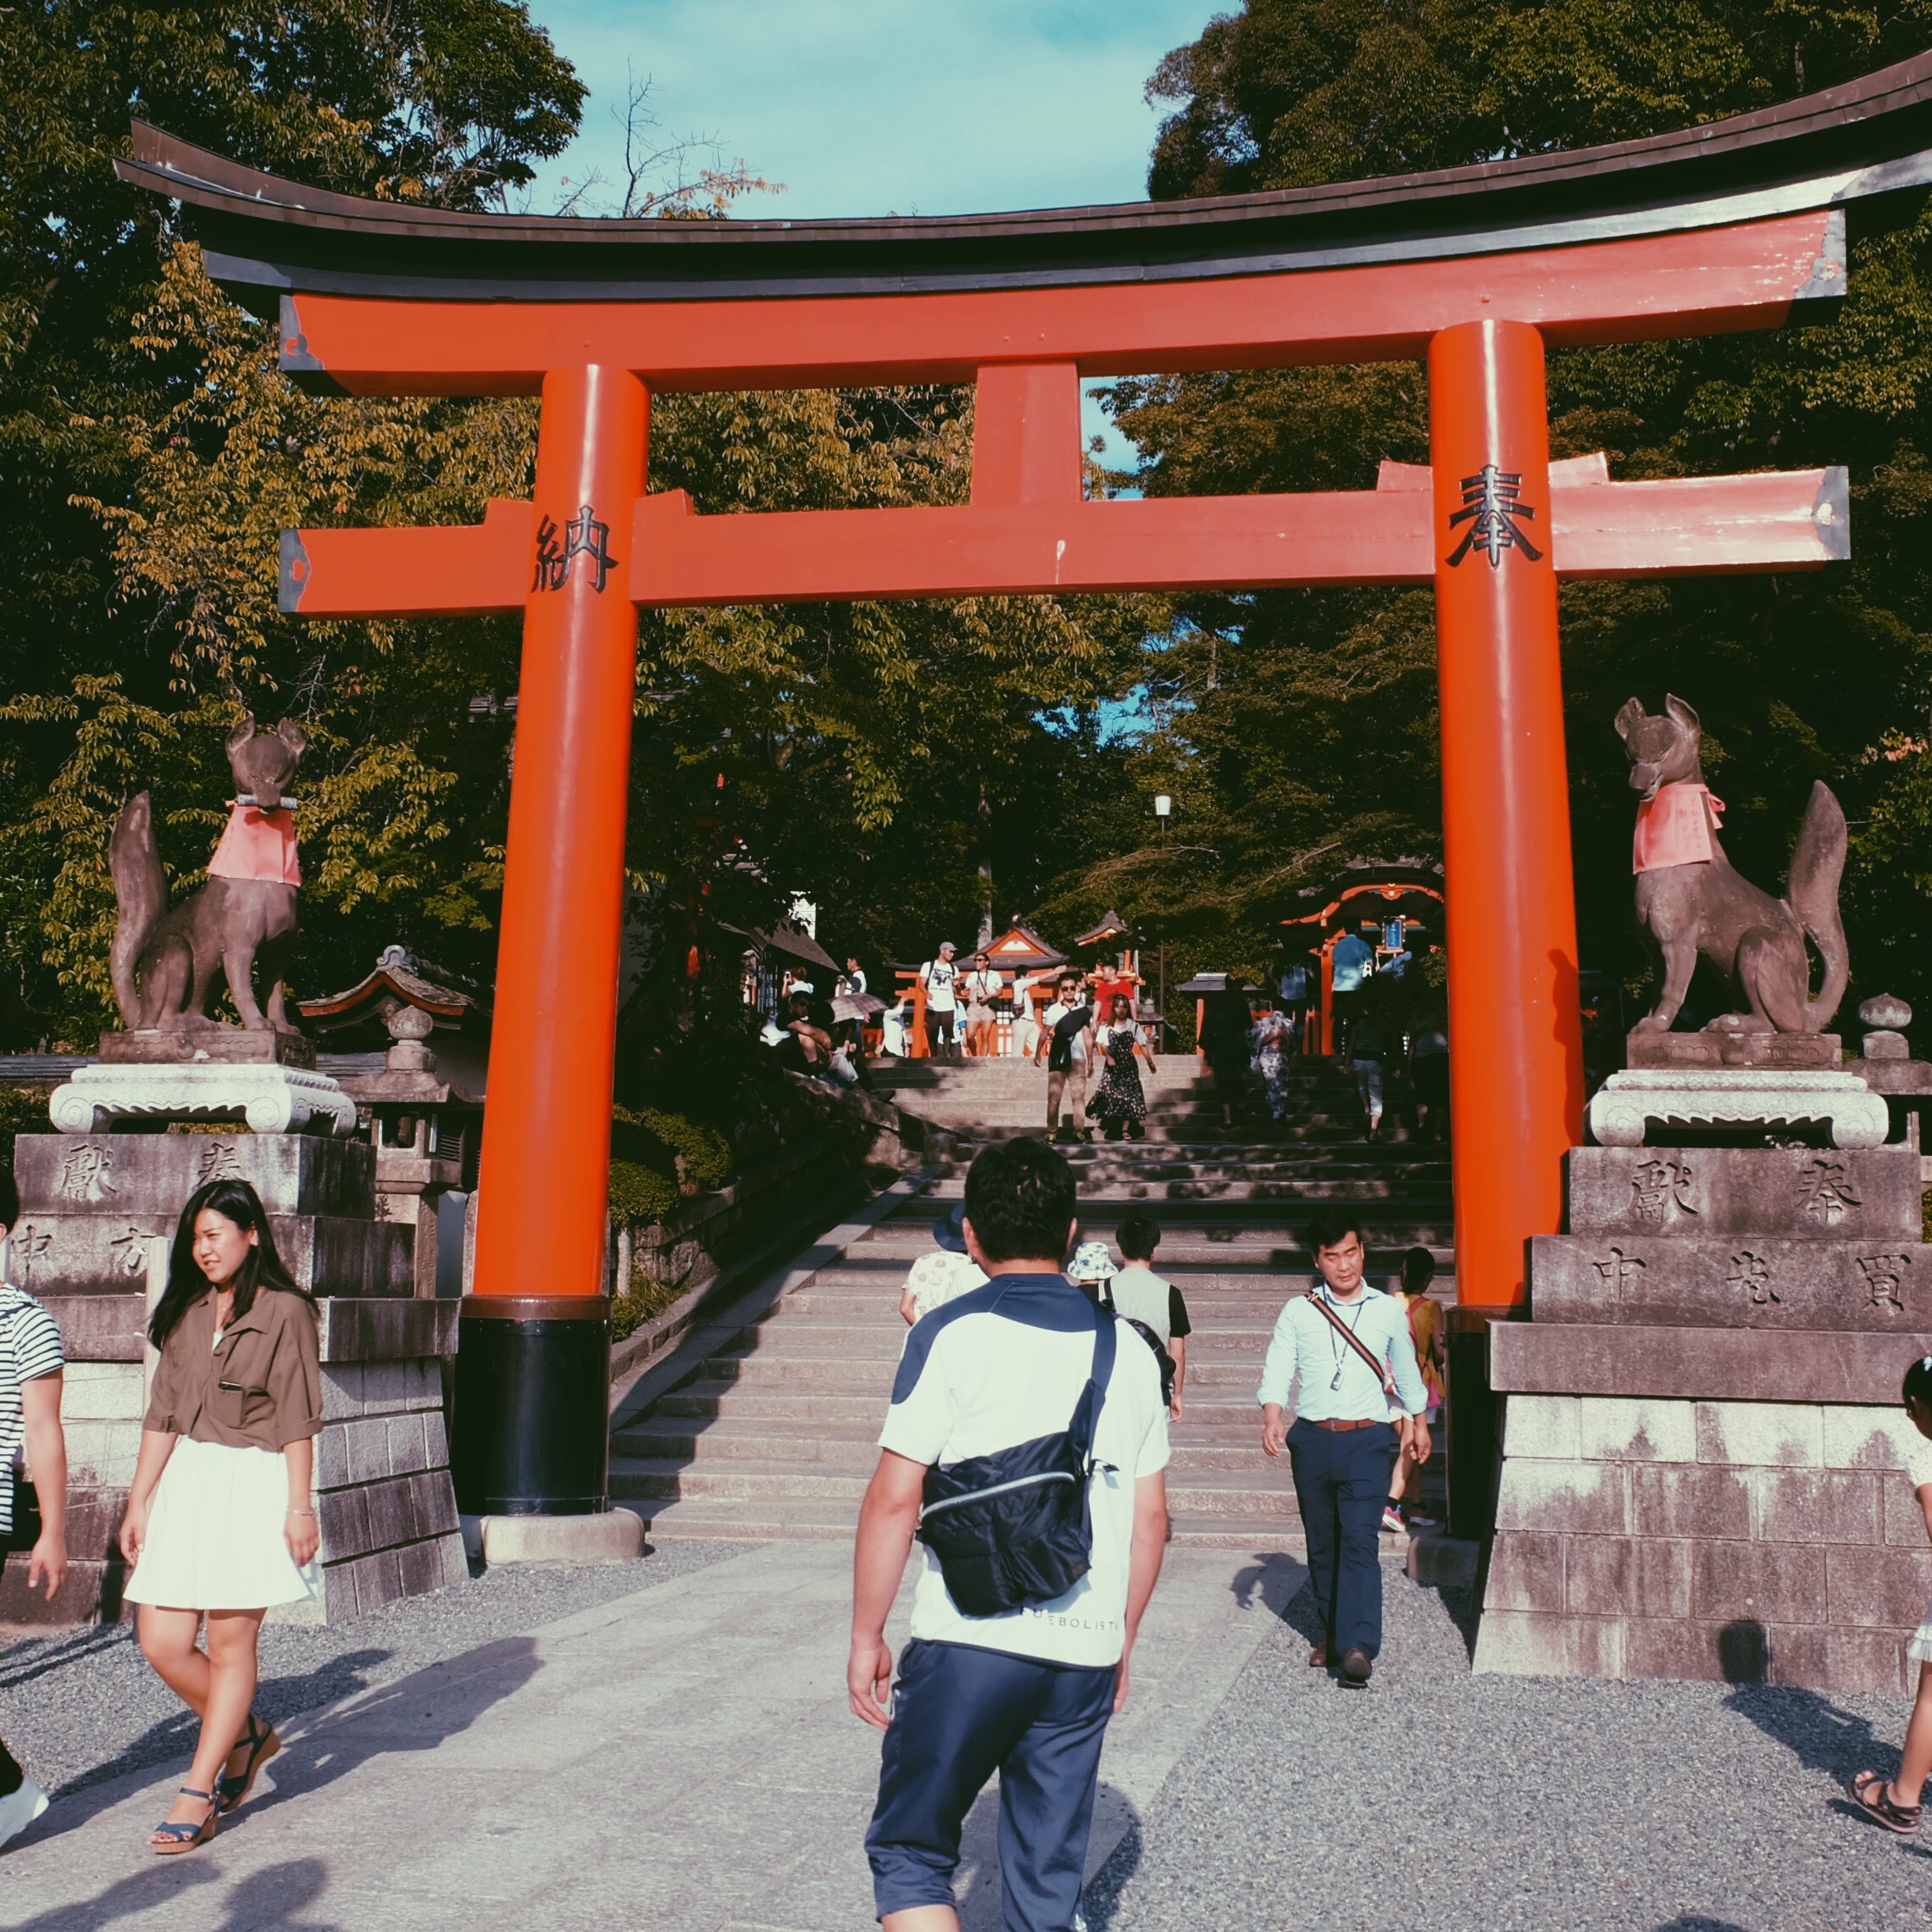
Fushimi Inari-taisha
Fushimi Inari Shrine
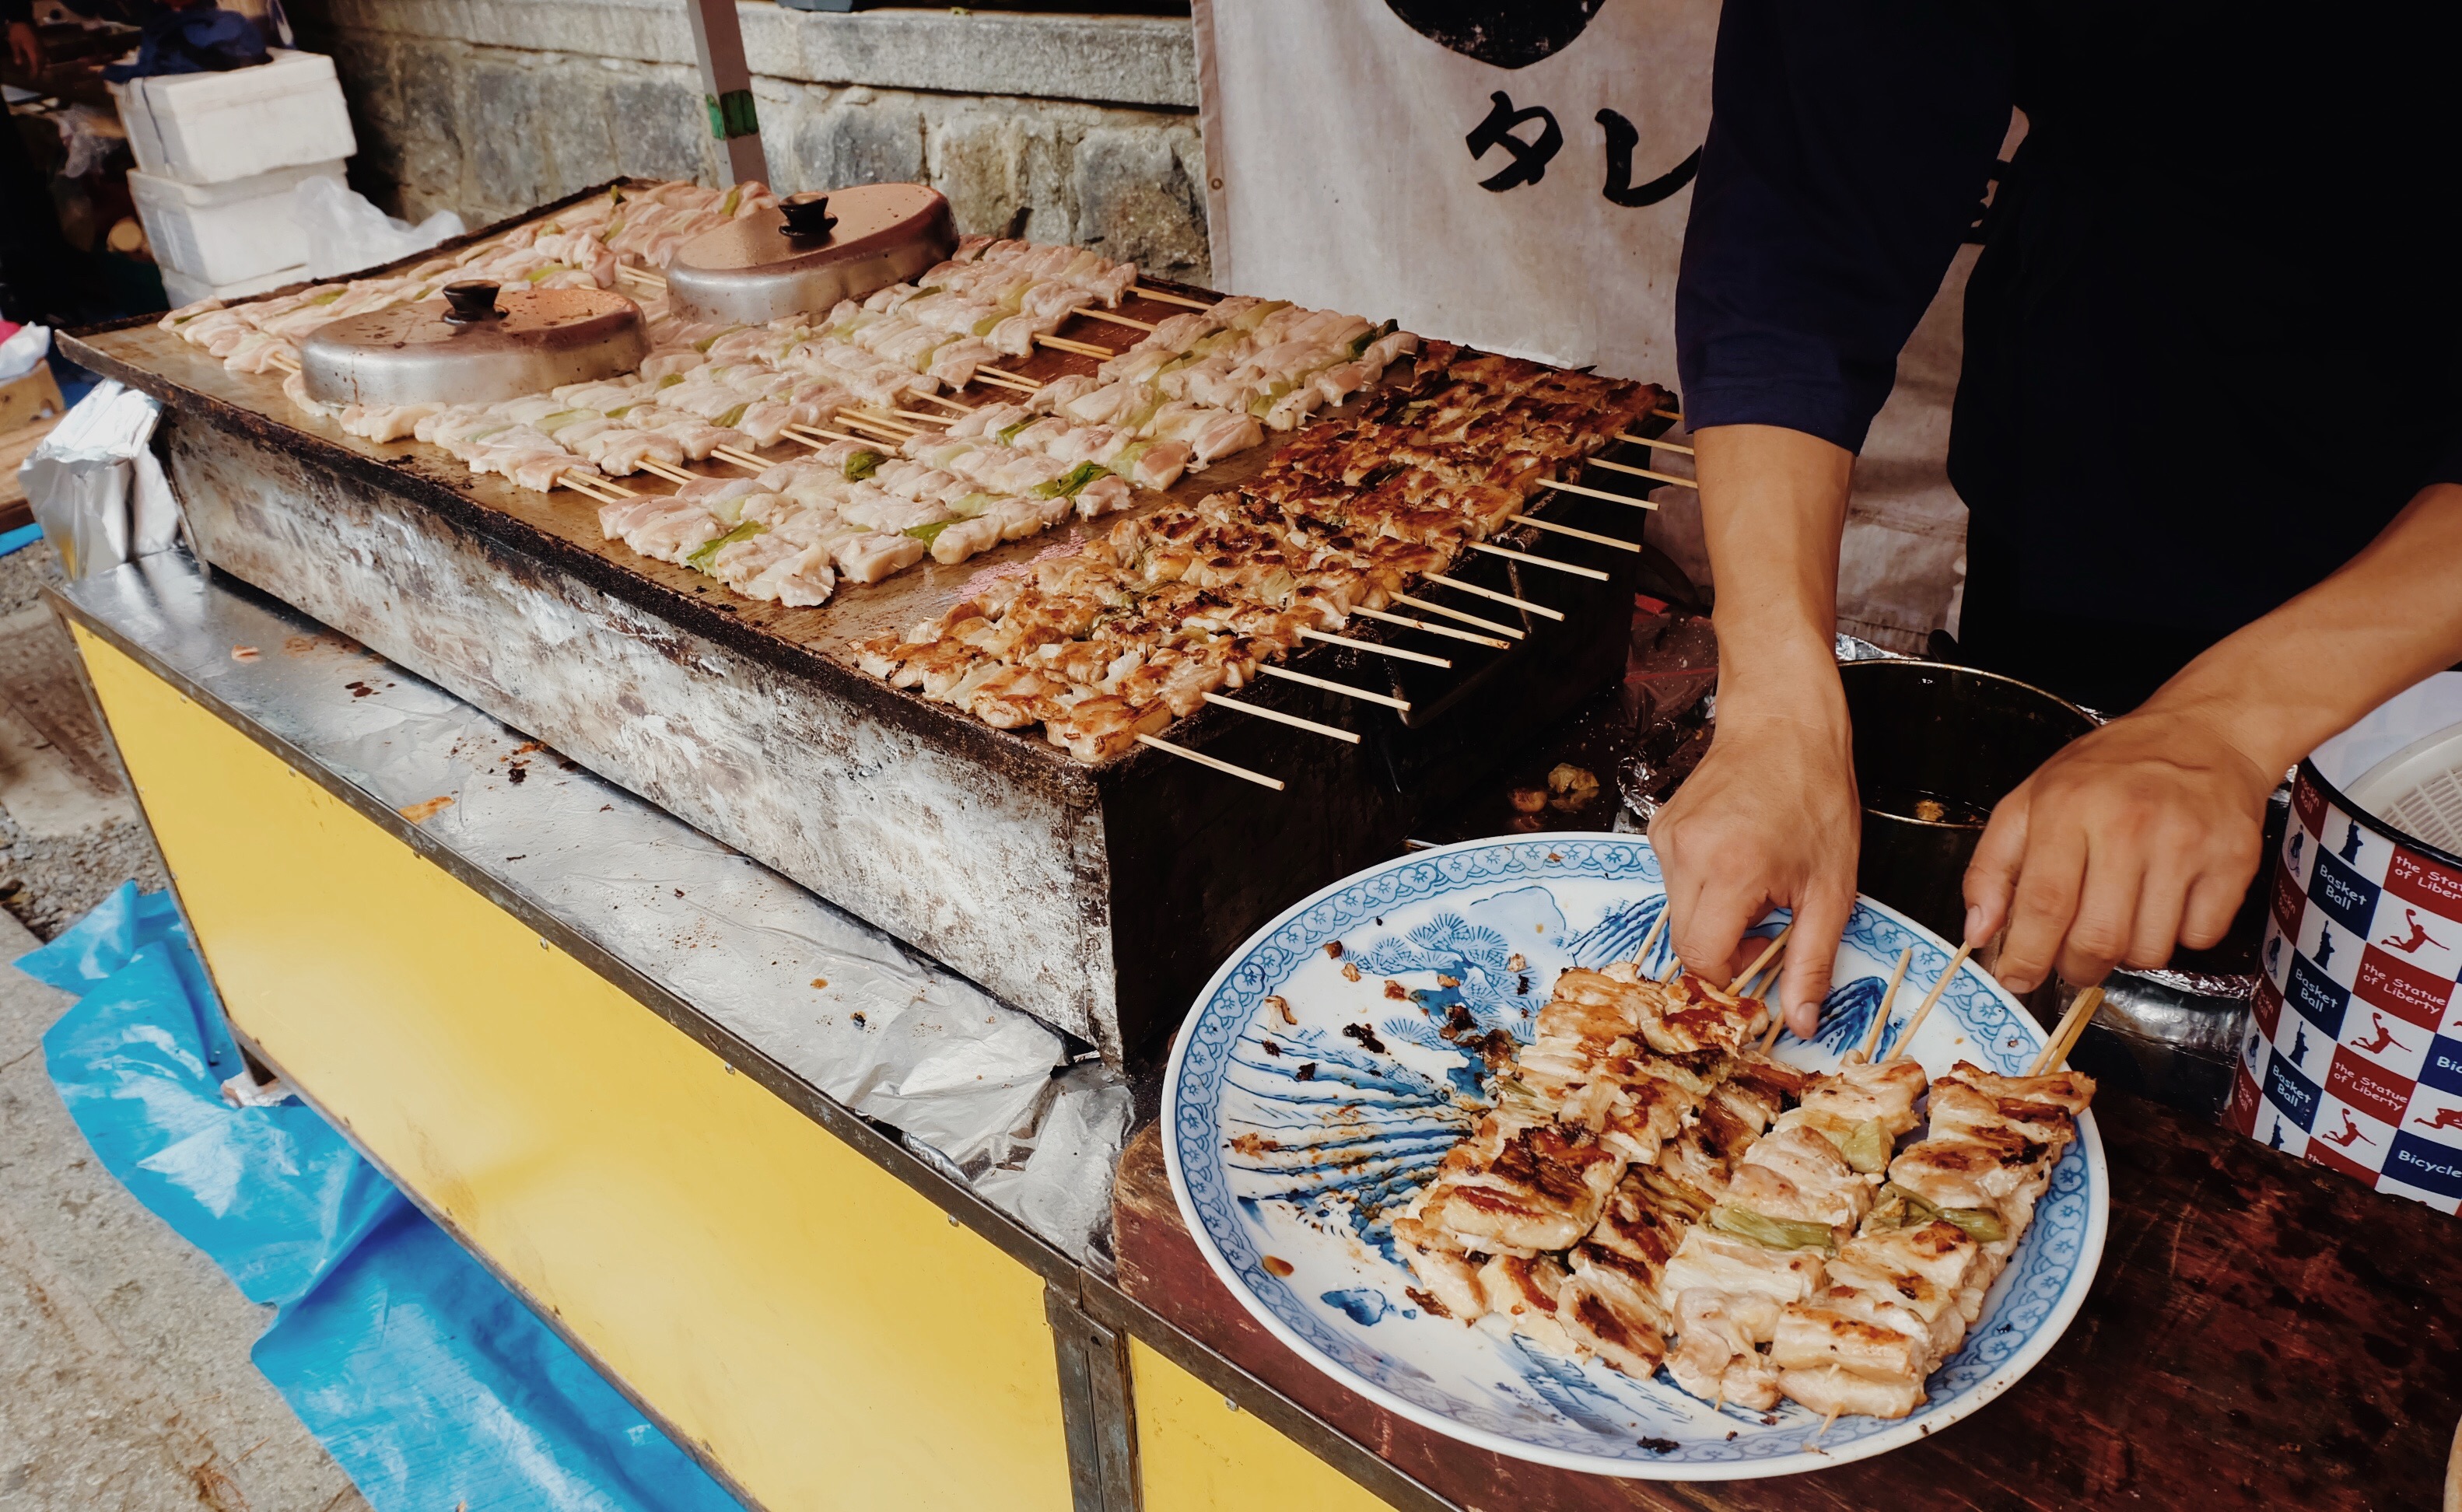
Tried their street food. It was quite expensive (250 pesos) compared to our isaw which is only 5 pesos. Unfair.
Not sure what this isWhat I ate: chicken in skewers. It was bland.
I think the reason why I bought this was because the guy selling these asked me my nationality. When I said Filipino, he replied with, “Ganda.” I was sold. LOL.
Rice cake wrapped in strips of pork
Done with snacking. Just a few steps away and we’ll reach our final destination for the day.
Greetings from the foxes
History Tidbit #4:
And I thought, why foxes? Upon googling, foxes are thought to be Inari’s messengers, resulting in many fox statues scattered across the shrine grounds. And who’s Inari? The Shinto god of rice.
Another travel goal unlocked 😁
It’s my ultimate dream to have my picture taken with these torii gates alone. With so many tourists walking along the same path, it would be difficult to achieve this shot. Kenneth’s patience was tested while taking this photo. Before taking the shot, I instructed him to hold up the camera so the people behind us would stop and let Kenneth take my picture. It was kind of embarrassing because it took about an awkward 30-45 seconds before all the people ahead of us disappear into view. But I’m so happy with the result!
Photo goal unlocked 📸
Kenneth is not really “the photographer” and doesn’t care if he has that perfect shot. As long as that thing or place is in the photo, it’s good enough for him. But I’m not like that, so I had a plan. A few months before this trip, I already briefed him that I want my photos to look like this and that; then I showed him sample photos so he will have an idea on how to frame the photo and stuff. And in fairness to him, he did a really good job; and I appreciate him for that (even if I can see him low-key frowning while doing it). 😅
History Tidbit #5:
So those orange things are called torii gates. Thousands of these torii gates lead to Mount Inari. (*Google Google*) These gates are donated by companies or individuals and each gate costs ¥400,000. The bigger ones could reach up to 1 million yen each. And those Japanese characters written in each gate are the names of those donors
We didn’t finish the trail because it would’ve taken us one and a half hours to reach Mt. Inari and another 1.5 hours to return. So I encouraged Kenneth to head back. Few more photos before going back to Osaka:
Closer look at the shrineIdk why I get cheerful whenever I see a takoyaki standBye Kyoto! Mwahmwahmwah!
Dotonbori Part 2
Dotonbori has a lot to offer when it comes to food so a single visit wouldn’t be enough. This time, we tried okonomiyaki and soba at Mizuno.
Looks can be deceiving
ANG SARAAP! Especially the soba. We thought we wouldn’t be able to finish everything because the servings were huge but we devoured every last bite. They were closed when we got there but we still fell in line. The manager was evidently annoyed because people kept on falling in line even if there’s already a ‘closed’ sign blocking the entrance. Thankfully, he let us into the queue. Maybe because we’re tourists and he thought that this would be our last chance to try their famous okonomiyaki. I chose the variant with minced meat, squid, shrimps, scallions and octopus bits. Sarap talagaaa.
I can say that this is the most tiring day of our 7-day trip. I’m not sure how many miles did we have to walk to accomplish our Kyoto itinerary. Even if we researched ahead of time and have all the navigation apps that you could think of, we kept on getting lost. And this resulted to countless arguments; plus the scorching heat is not helping with our tempers.
Hoping I could see you again 😢
This is also the day when two of our friends will join us for our last day in Osaka before heading to Tokyo. It does get tiring arguing with Kenneth so it’s really fun seeing these two argue with each other for a change. 😂
This is how we spent our 7 days in JaFUN (Sep 8-14, 2016):
USJ Day! It was a 15-minute walk to Shin-Imamiya Station (from Ken & Mark Guest House) going to Universal City Station. Some morning sightings while strolling around Osaka: